How-To: Valve Adjustment for Honda PCX
Posted: Thu Nov 03, 2011 2:35 pm
Valve Adjustment How-To
Alright guys... here we go... Disclaimer first!
Disclaimer:
I am not at all a professional mechanic... I have taught myself about engines on a couple other bikes I have had. A "71 CB500, then a "01 SV650 with large help to the internet and friends. I will do my best to describe a valve adjustment but will not be held responsible if anything goes haywire with your bike after doing your own maintenance. This is not professional advice. Please correct me if I mixed something up or used incorrect terms and I will edit to perfection. Thanks!
SOURCES: (pictures and quotes)
Honda Motor Co., Ltd. Honda Service Manual 2011 PCX125. N.p.: Service
Publication Office, 2010. Print.
Tools needed. Plastic removing tools, feeler gauges, 8,9,10,12,22mm open end wrenches, 8,10,12mm sockets with extension, phillips head screwdriver, gasket sealant.
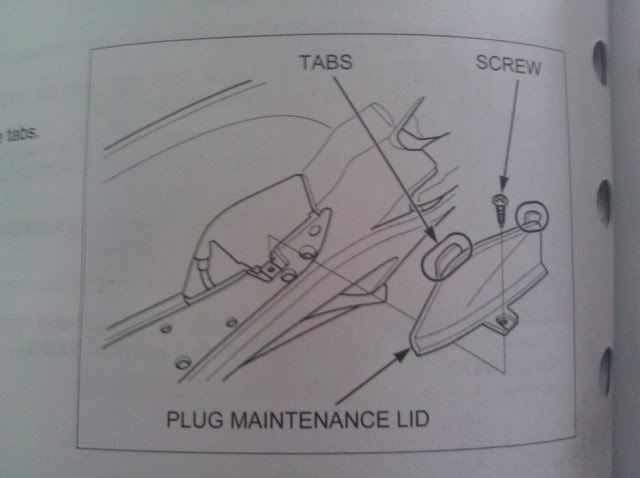
Remove the plastics. I started with the lower: remove BOTH sides

dont forget!
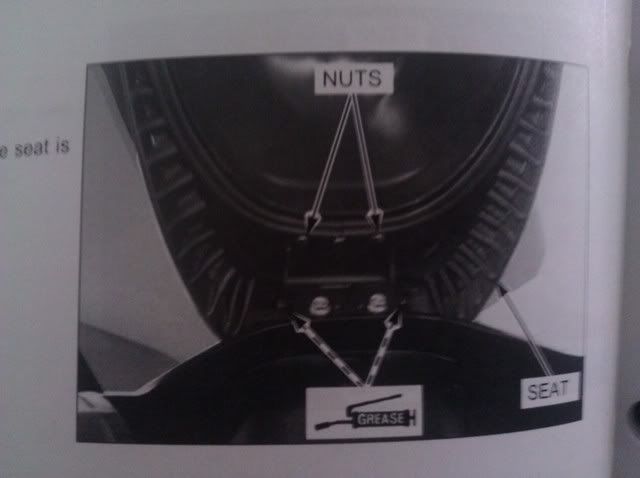
then the seat:
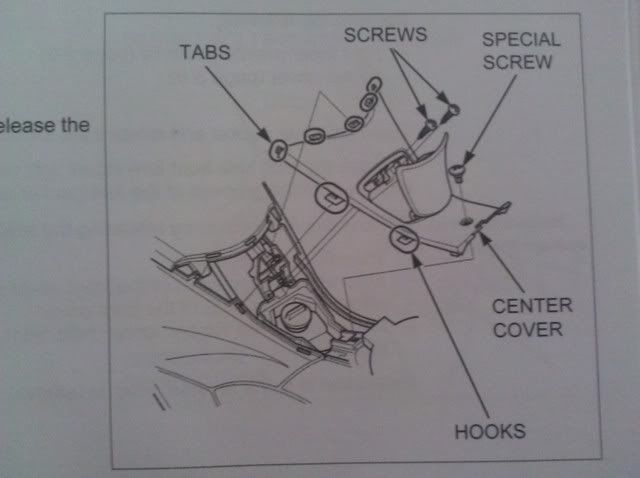
then the center cover:
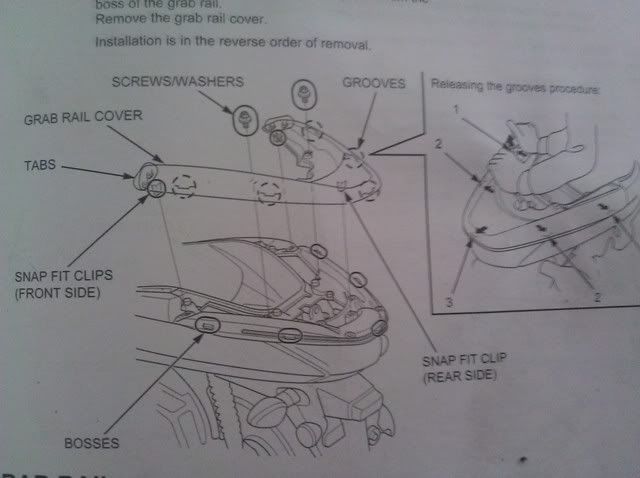
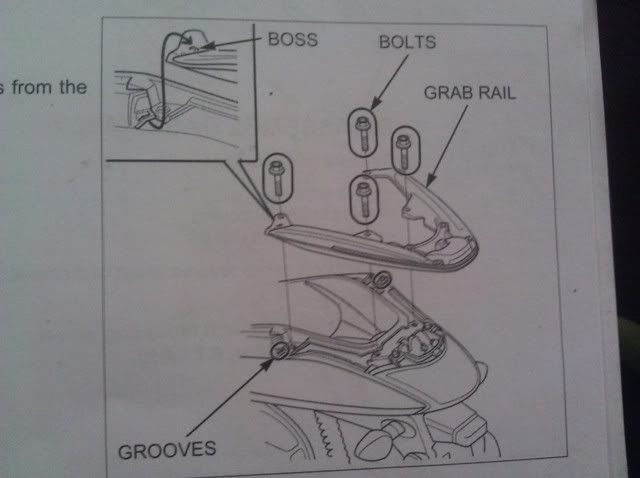
then the grab rail cover:
then the grab rail:
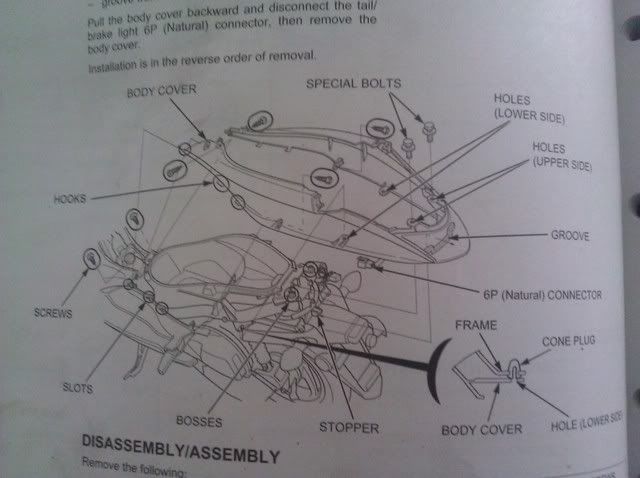
then the side covers: (no need to remove the taillight, will all come off in one piece
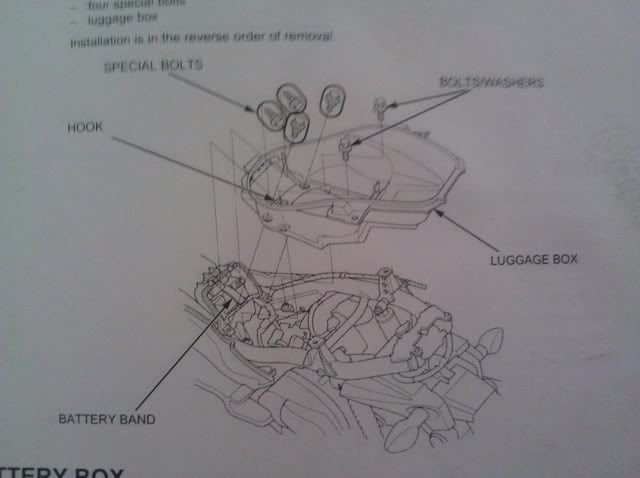
then the cargo box:
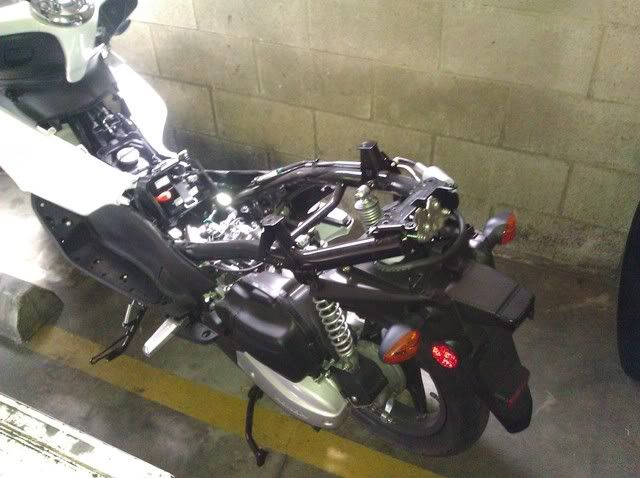
Then remove the battery box. (1 bolt). DO NOT disconnect the battery yet, you will need it in a moment. when you're done it will look something like this.
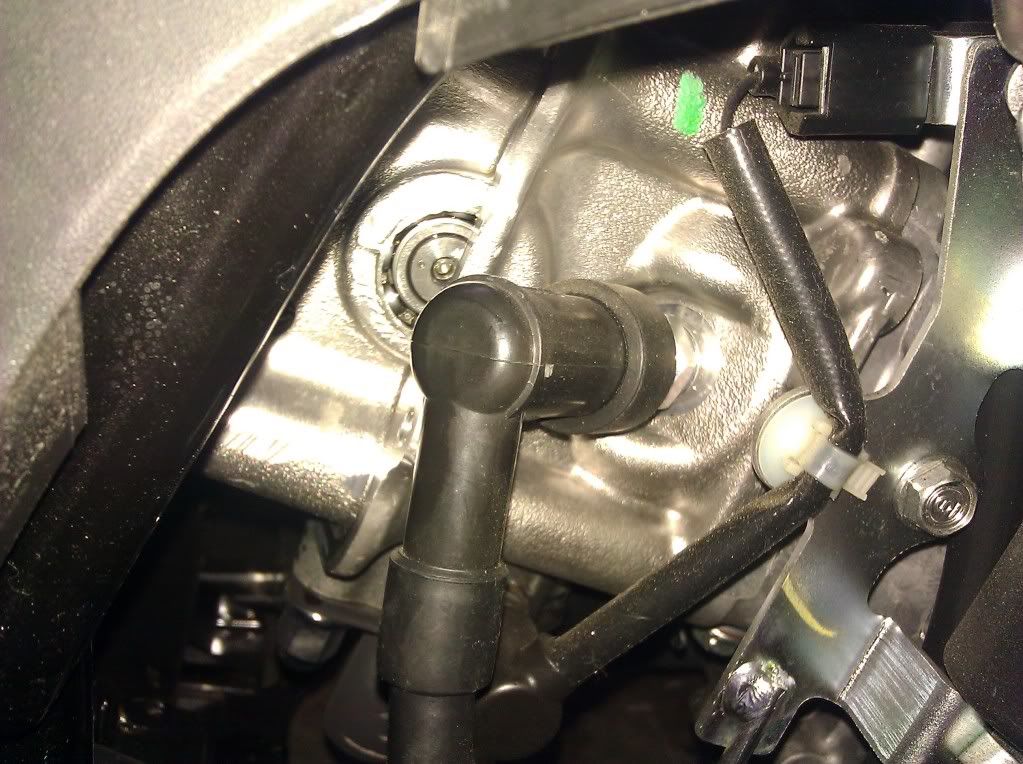
Disconnect the fuel pump:
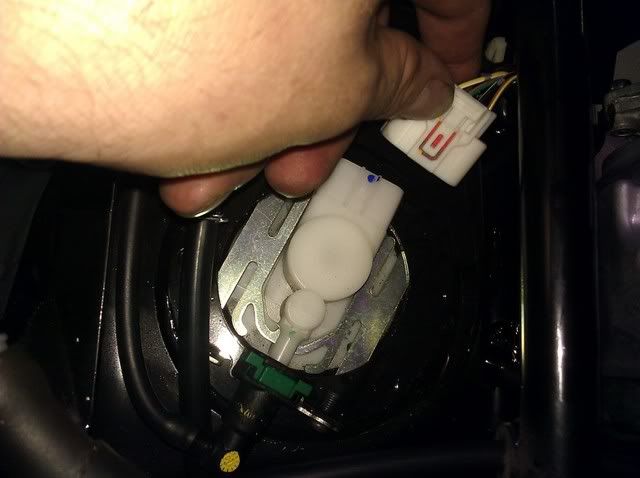
then relieve the fuel pressure. turn ignition on and press the starter for 5 seconds. After that, remove the fuel line, fuel line clamp bolt, and the crankcase breather hose
pull up on the green tab to remove: use a rag to catch excess fuel
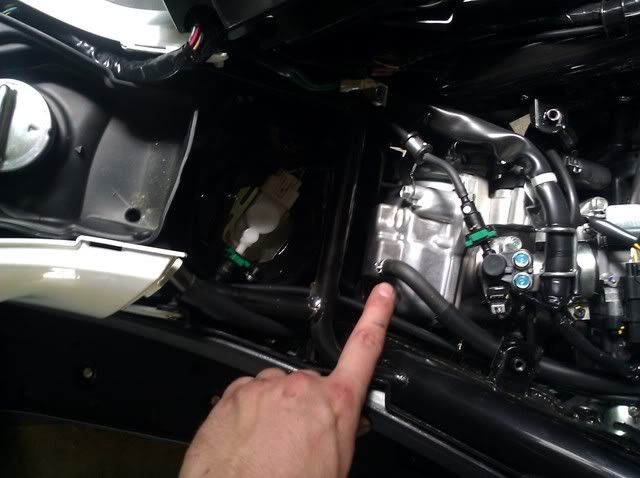
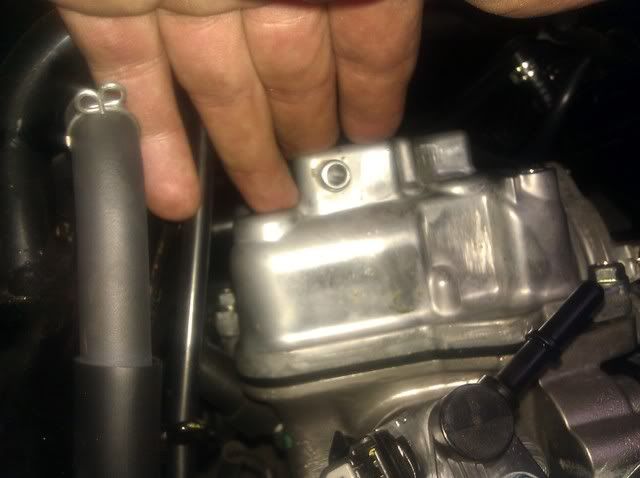
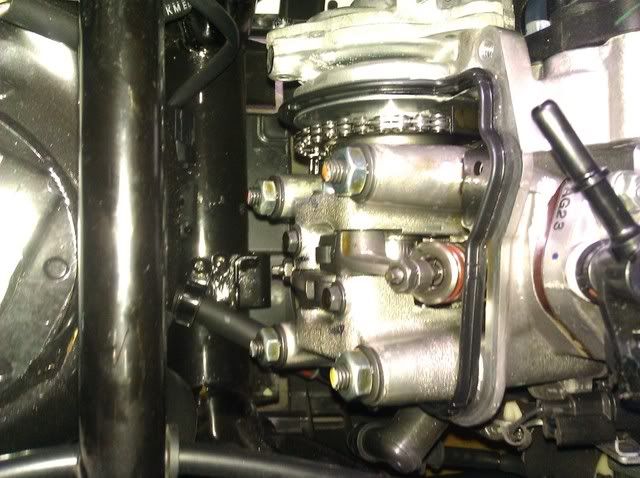
Then remove the cylinder head itself, Exposing the valves. 3 bolts
then remove 3 bolts on the left cover exposing the crankshaft
Remove the right side radiator cover (3 bolts) and remove the 4 bolts holding the radiator on to expose the fan. Do not disconnect any hoses going to the radiator.

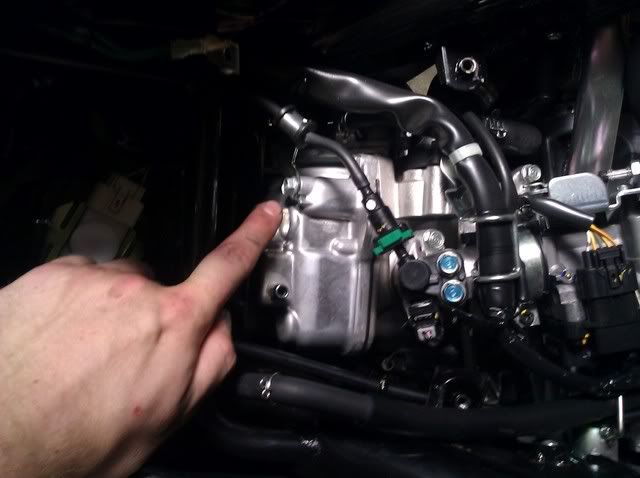
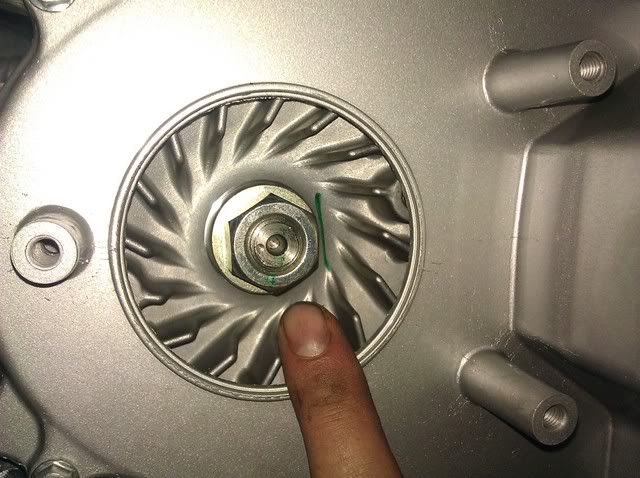
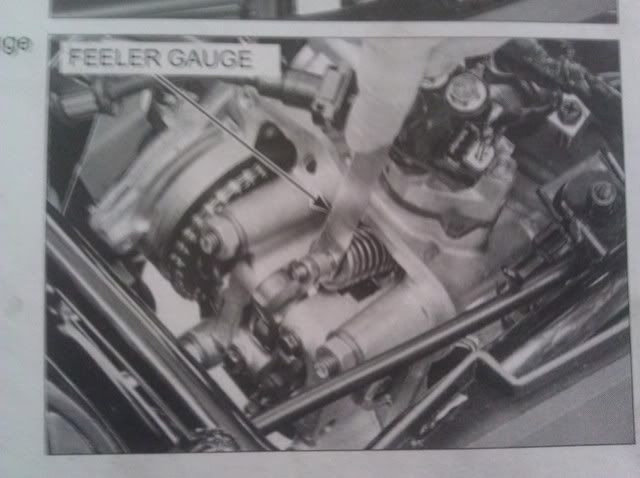
turn the crankshaft COUNTER CLOCKWISE until the index mark and the cutout on the fan line up as pictured above, test to see if there is slack on the rocker arm by giving it a wiggle
if it feels like its not moving then you will need to spin the crankshaft a full 360 degrees to be at top dead center. Verify that the index mark and cutout on the fan line up again, and verify that the index line and the punch mark on the camshaft line up pictured below:
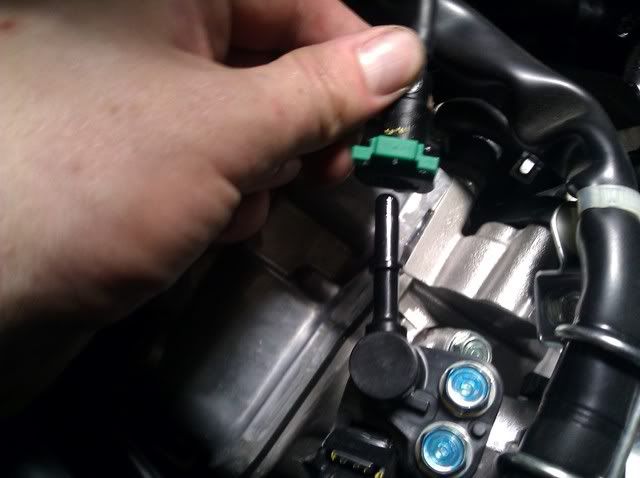
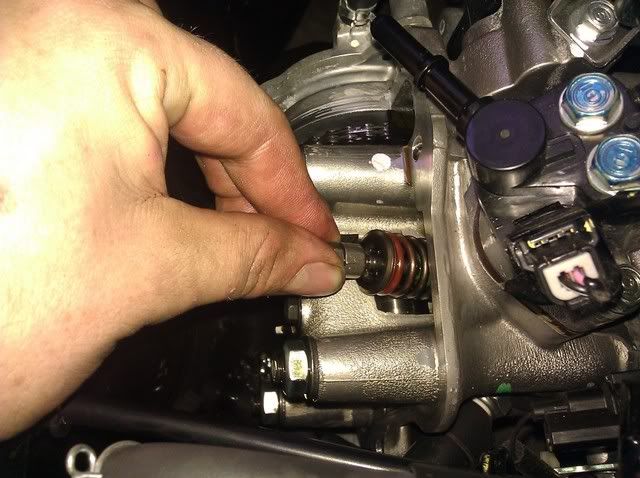
once the piston is in the correct place, use your feeler gauges to measure the clearance between the valve adjusting screw and valve stem. The valve on the top of the engine is intake, and the valve on the bottom is exhaust. the clearance is
PCX 125/150:
INTAKE: 0.10 +/- .02mm (0.004 +/- 0.001in)
EXHAUST: 0.24 +/- .02mm (0.009 +/- 0.001in)
I found it easiest to loosen the nut a lot and just twisted the adjusting screw by hand, gave me better control than pliers.
once you're done reassemble in the reverse order.
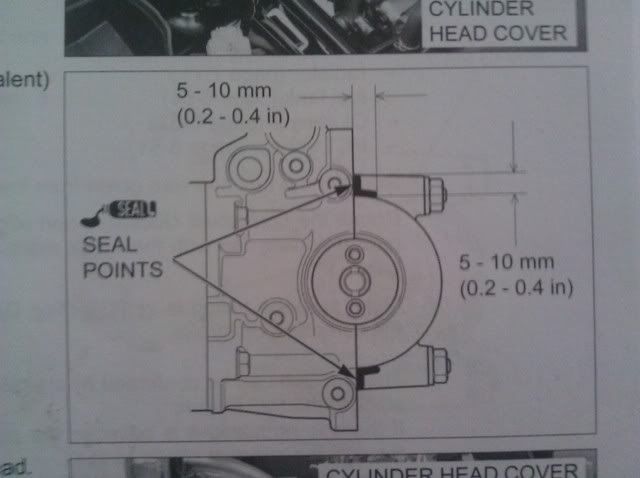
be sure to re-apply sealant on the cylinder head cover to the places shown here:
Hope this helps!
Alright guys... here we go... Disclaimer first!
Disclaimer:
I am not at all a professional mechanic... I have taught myself about engines on a couple other bikes I have had. A "71 CB500, then a "01 SV650 with large help to the internet and friends. I will do my best to describe a valve adjustment but will not be held responsible if anything goes haywire with your bike after doing your own maintenance. This is not professional advice. Please correct me if I mixed something up or used incorrect terms and I will edit to perfection. Thanks!
SOURCES: (pictures and quotes)
Honda Motor Co., Ltd. Honda Service Manual 2011 PCX125. N.p.: Service
Publication Office, 2010. Print.
Tools needed. Plastic removing tools, feeler gauges, 8,9,10,12,22mm open end wrenches, 8,10,12mm sockets with extension, phillips head screwdriver, gasket sealant.
Some people even like to wait overnight (like me)maddiedog wrote:Your bike must be cold when doing a valve adjustment. You should wait at least 4 or 5 hours since it has been on last. If you do not, you may burn yourself or set clearances too tight, since the metal expands slightly when hot.
Remove the plastics. I started with the lower: remove BOTH sides
dont forget!
then the seat:
then the center cover:
then the grab rail cover:
then the grab rail:
then the side covers: (no need to remove the taillight, will all come off in one piece
then the cargo box:
Then remove the battery box. (1 bolt). DO NOT disconnect the battery yet, you will need it in a moment. when you're done it will look something like this.
Disconnect the fuel pump:
then relieve the fuel pressure. turn ignition on and press the starter for 5 seconds. After that, remove the fuel line, fuel line clamp bolt, and the crankcase breather hose
pull up on the green tab to remove: use a rag to catch excess fuel
Then remove the cylinder head itself, Exposing the valves. 3 bolts
then remove 3 bolts on the left cover exposing the crankshaft
Remove the right side radiator cover (3 bolts) and remove the 4 bolts holding the radiator on to expose the fan. Do not disconnect any hoses going to the radiator.
turn the crankshaft COUNTER CLOCKWISE until the index mark and the cutout on the fan line up as pictured above, test to see if there is slack on the rocker arm by giving it a wiggle
if it feels like its not moving then you will need to spin the crankshaft a full 360 degrees to be at top dead center. Verify that the index mark and cutout on the fan line up again, and verify that the index line and the punch mark on the camshaft line up pictured below:
once the piston is in the correct place, use your feeler gauges to measure the clearance between the valve adjusting screw and valve stem. The valve on the top of the engine is intake, and the valve on the bottom is exhaust. the clearance is
PCX 125/150:
INTAKE: 0.10 +/- .02mm (0.004 +/- 0.001in)
EXHAUST: 0.24 +/- .02mm (0.009 +/- 0.001in)
If the valve clearance is incorrect, loosen the valve adjusting screw lock nut and adjust the valve clearance by turning the adjusting screw until there is a slight drag on the feeler gauge.
I found it easiest to loosen the nut a lot and just twisted the adjusting screw by hand, gave me better control than pliers.
once you're done reassemble in the reverse order.
be sure to re-apply sealant on the cylinder head cover to the places shown here:
Hope this helps!