
The suspension being installed in this tutorial is a Takegawa set of lowering suspension. It'll provide over an inch of drop, great for shorter riders. These shocks have several rebound settings, which is nice for adjusting for rider weight, but lack the dampening adjustment that the high-end (roughly 200 Euros) YSS suspension has. These are also the only lowering shocks that I know of -- the YSS suspension sets, the NCY set, and other brands all provide roughly the same ride height as stock.
A quick primer on suspension -- skip this paragraph and the one after it if you know how suspension works, or only care about installation. Suspension soaks up the bumps in the road, keeping your tires more solidly on the ground, and maintaining better traction and control of the bike. If you ever feel like the rear end is floating, or the bike isn't "planted" and lacks traction over bumps or around hard corners, your suspension isn't properly adjusted or is inadequate. Proper suspension makes a HUGE difference in ride feel and handling, allowing much better control of the bike. While the suspension on the PCX is okay, it is very soft and has very little dampening. It tends to bounce over ruts or bottom out on potholes, and leaves you floating around corners.
There are two main factors to suspension, rebound and dampening. Rebound is how strongly the suspension responds to a bump. "Stiffer" suspension typically has much more rebound, "Softer" suspension has less. The ideal stiffness of suspension varies with rider weight -- when you're looking for suspension for your PCX, make sure you buy a model that is appropriate to the weight of the rider(s) of your bike. Too stiff of suspension can lead to violent recoil after a bump, and a really rough ride that can leave your butt sore. Too soft of a suspension will bottom out constantly, and do next to nothing if riding two-up. Rebound is determined by the strength and length of the springs on the suspension. The other factor, Dampening, is how quickly the bounce from impact is absorbed. Dampening is provided either by gas and hydraulic fluid in the middle of the suspension on high-end shocks, or just through hydraulics on most suspension. Too much dampening won't allow the suspension to recoil fully, and the suspension will be ineffective. Your bike will bounce, but it will be a jarring bounce of the actual bike (not just the swingarm) bouncing. Too little dampening will make the bike bouncy and feel like it's floating, almost like you're piloting a jetski. You'll hit a bump, bounce from it, and keep bouncing over and over afterwards. Typically stronger and stiffer rebound requires more dampening, which is why having a shock that adjusts both is ideal. Without adjustable dampening, you risk a bouncy ride. Really though, the PCX is a scooter, not a dirt bike. Most of you people will be fine without adjustable dampening, and will notice a huge improvement from any suspension upgrade at all.
Here is the suspension being installed in this tutorial:
- img02.JPG (345.7 KiB) Viewed 22257 times
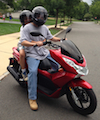
And Freddi's PCX that will be getting the suspension. It's a 2013 PCX 150.
- img03.JPG (340.2 KiB) Viewed 22257 times
A comparison of the stock shocks to the new shocks. The new ones will lower the bike more than an inch.
- img04.JPG (307.13 KiB) Viewed 22257 times
To start the process of installation, we have to expose the top mounts for the shocks. Pop the seat open and start to remove the rear wing cover. There are two Philips-head screws that must be removed.
- img06.JPG (305.26 KiB) Viewed 22257 times
- img05.JPG (283.21 KiB) Viewed 22257 times
Once the screws are removed, gently pry the rear wing cover off. The two front clips pull off by pushing them away from the center of the bike, directly left or right, and the rear one just pops up once the front two clips have been removed.
- img07.JPG (283.82 KiB) Viewed 22257 times
Removing the rear cover exposes the back of the underseat bin and the rear support. Remove the rear support next. There are four bolts that hold it in place.
- img09.JPG (241.77 KiB) Viewed 22257 times
Once the bolts are removed, gently lift at the back and unclip the rear side fairings from the front of the rear support on either side.
- img10.JPG (294.83 KiB) Viewed 22257 times
- img11.JPG (292.49 KiB) Viewed 22257 times
The underseat bin must be removed next. The seat attaches directly to it, but can remain attached through the procedure. Remove the four bolts at the bottom, noting that the two in front are different than the two towards the back.
- img12.JPG (297.02 KiB) Viewed 22257 times
Remove the two Philips-head screws on either side of the seat hinge.
- img13.JPG (267.9 KiB) Viewed 22257 times
Remove the battery cover. To remove it, push the button in the middle down, then gently pry off the round clip.
- img14.JPG (280.37 KiB) Viewed 22257 times
Unclip the battery -- the clip attaches to the underseat bin.
- img15.JPG (281.45 KiB) Viewed 22257 times
Remove the last two bolts holding the underseat bin in place, just above the battery.
- img16.JPG (286.22 KiB) Viewed 22257 times
The underseat bin is still underneath the left and right rear side panels -- gently pull them back while lifting the bin from the back.
- img17.JPG (285.32 KiB) Viewed 22257 times
And lift the seat and underseat bin out.
- img18.JPG (301.83 KiB) Viewed 22257 times
Remove the exhaust. This is necessary to access the right-side suspension lower mount. The exhaust has 3 bolts on the swingarm, and two bolts up front underneath on the engine block. The 3 bolts on the swingarm are WAY overtightened from the factory -- you may need to use an impact wrench or breaker bar to loosen them. The two bolts underneath the engine block are difficult to access, you'll need a 3/8" ratchet with an extension and the proper sized socket (standard metric, I don't recall the exact size).
- img19.JPG (204.79 KiB) Viewed 22257 times
We'll remove the suspension next, but need to support the front of the bike or it will flop forwards. I chose to do this using a floor jack, a piece of wood, and a rag. You can also use one of the metal bars on the frame to hang the scooter from the ceiling by a strap. You still want some weight on the front wheel, but you want to have the majority of the bike supported by the jack, so don't go lifting the bike a foot in the air.
- img20.JPG (313.33 KiB) Viewed 22257 times
- img21.JPG (219.12 KiB) Viewed 22257 times
Now that the bike's stable and won't flop forwards, time to pull the suspension. All the weight of the scooter is on the centerstand and the jack, so you can just take the shocks all the way out. Start with the two top mounts.
- img23.JPG (284.16 KiB) Viewed 22257 times
And then remove the two bottom mounts. You'll need to use an extender to reach the lower mounting bolt on the left side.
- img24.JPG (194.24 KiB) Viewed 22257 times
- img25.JPG (241.08 KiB) Viewed 22257 times
Slide the shocks off the top.
- img26.JPG (198.66 KiB) Viewed 22257 times
Now that your suspension is removed, compare the stock and new suspension. Good drop on these. Springs look thicker and more substantial too.
- img27.JPG (235.97 KiB) Viewed 22257 times
(optional) Have the dog inspect your work so far, and get a beer. You're halfway there, and it's all downhill from here.
- img30.JPG (219.06 KiB) Viewed 22257 times
Slide on the new suspension:
- img28.JPG (195.73 KiB) Viewed 22257 times
- img31.JPG (213.28 KiB) Viewed 22257 times
And attach it. If the suspension is a different length than stock, you may have to lift the rear swingarm to get it in position to mount the shock. It is a good idea to have someone help hold the front of the bike, just in case it gets bonked off balance. I did it solo though, my wife was too busy taking pictures for you people.
You can optionally put some grease on the bushings where the suspension mounts. Honda does not do that from the factory, but it can't hurt. Torque the bolts down about as hard as they were torqued to begin with -- sane, but not ridiculously tight. I used a bit of locktite blue to keep the bolts from rattling loose, I highly recommend you do the same.
- img32.JPG (206.94 KiB) Viewed 22257 times
Once the suspension is bolted in place, drop the jack and reassemble the rest of the bike in the reverse order of this tutorial.
Here is the completed PCX 150 next to my PCX 125. My PCX has a rear fender removal kit, but you still get the idea -- there is a huge difference in height with the lowered suspension:
- img33.JPG (298.47 KiB) Viewed 22257 times
All done! Go get up to speed and hit some bumps, the difference is huge. Enjoy the ride, and if anything is unclear or you have any trouble, feel free to ask.
If you liked this tutorial and it saved you some money from having the dealer work on your bike, feel free to buy me a pint of beer at the donation link at the very bottom of the forum.