Page 1 of 3
Anyone been in here?
Posted: Fri Aug 22, 2014 7:41 am
by fish
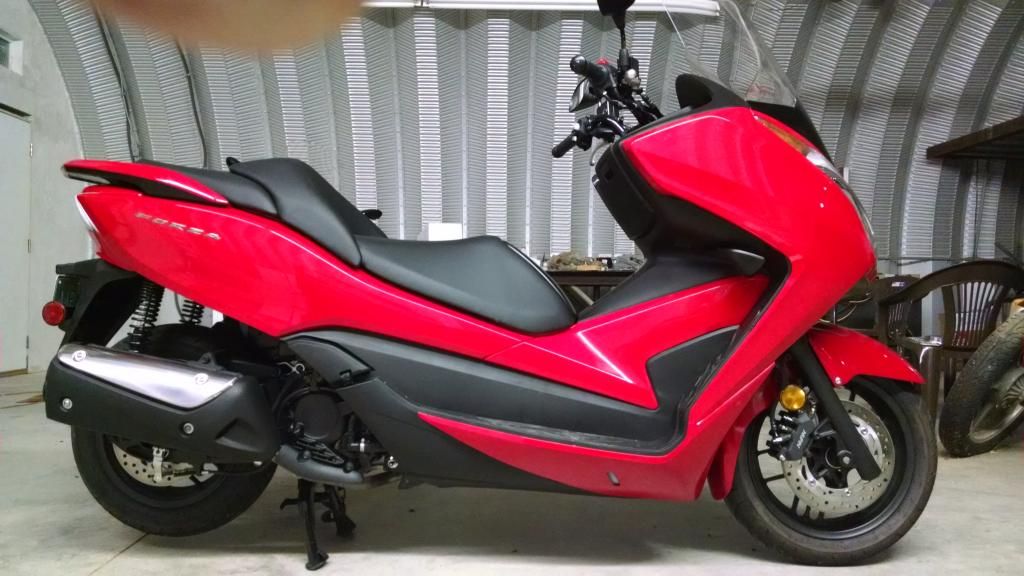
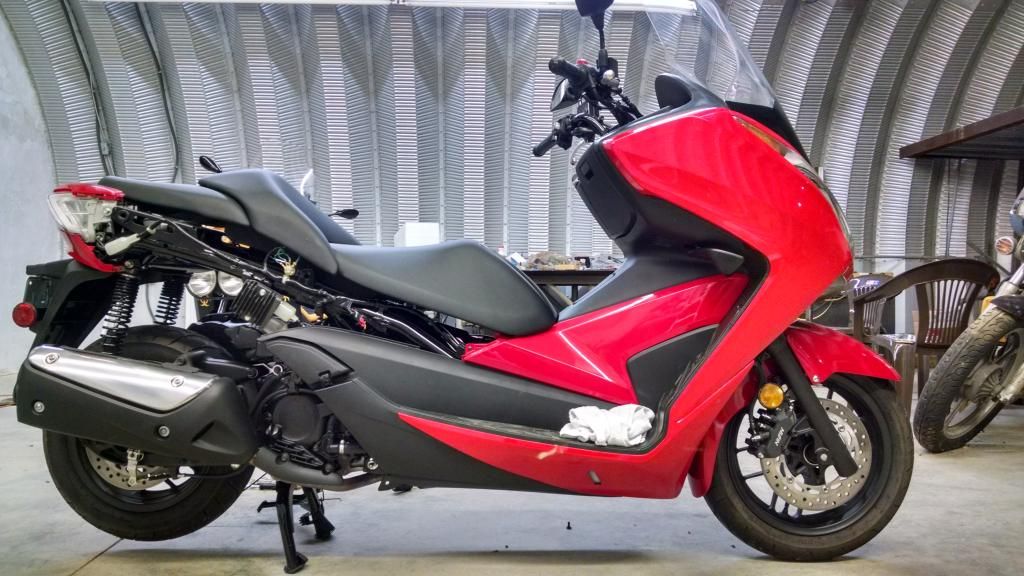
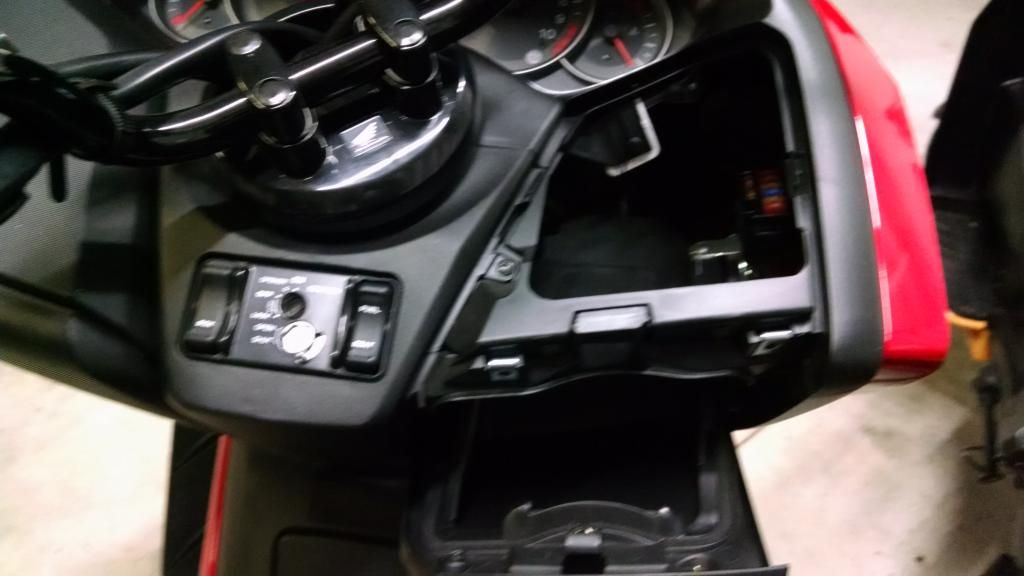
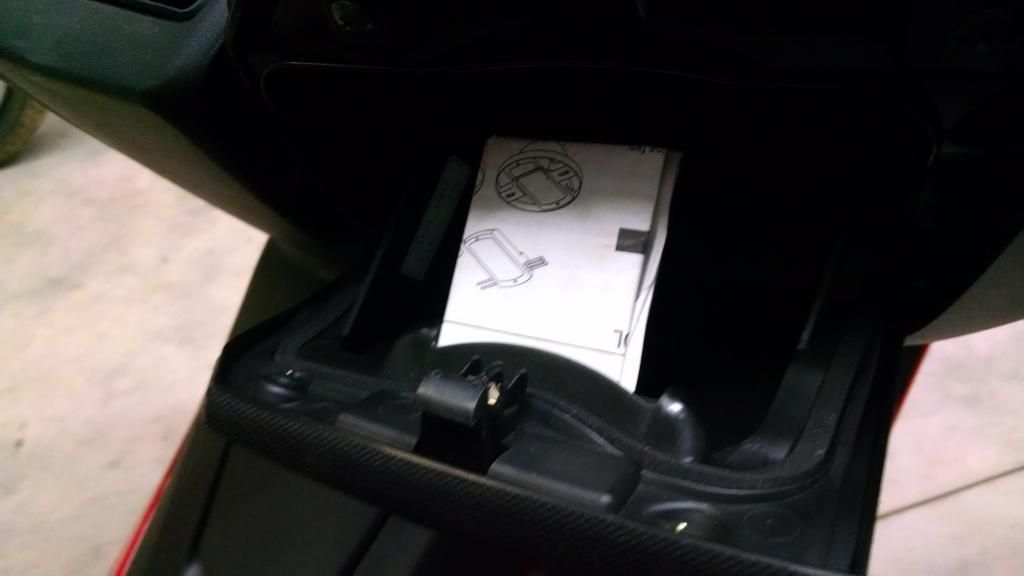
Figured out what this hatch is by the part name ...but, has anyone been in there to see what's in there ..or why it's needed.
A photo would be very interesting.
Nice that Honda made us a door to get at it, whatever it is. (like the spark plug door and coolant top-off doors - pretty cool. (maybe they just felt so embarrassed about the PCX valve adjustment fiasco that they scrambled to do something, anything - to save face on the next scooter off the drawing board? How many of us know someone who passed up the PCX because of the poor mechanic-friendly design? Not to mention its tiny size. It's a beauty on paper until you sit on one.)
Fish

Re: Anyone been in here?
Posted: Fri Aug 22, 2014 1:00 pm
by Alibally
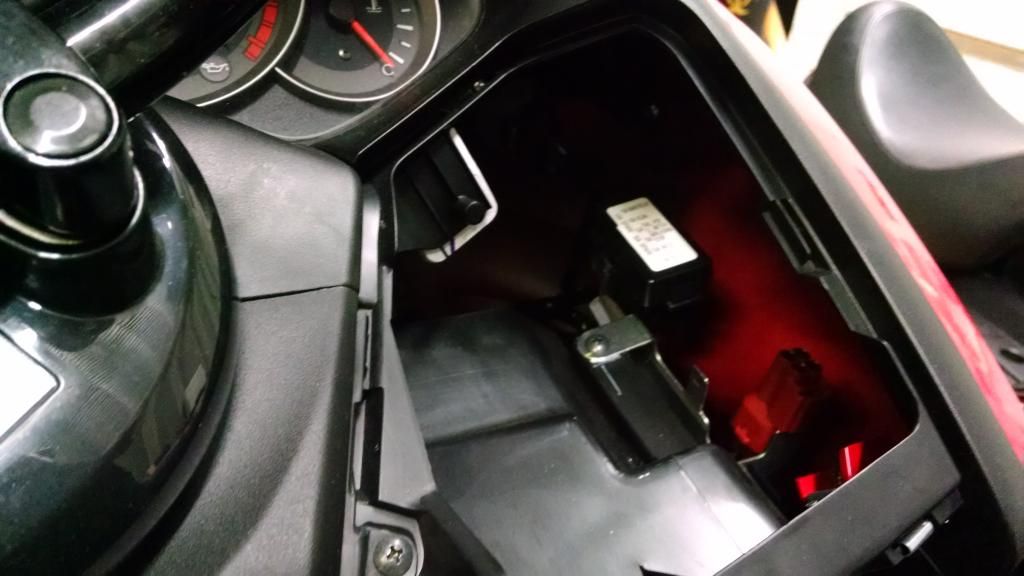
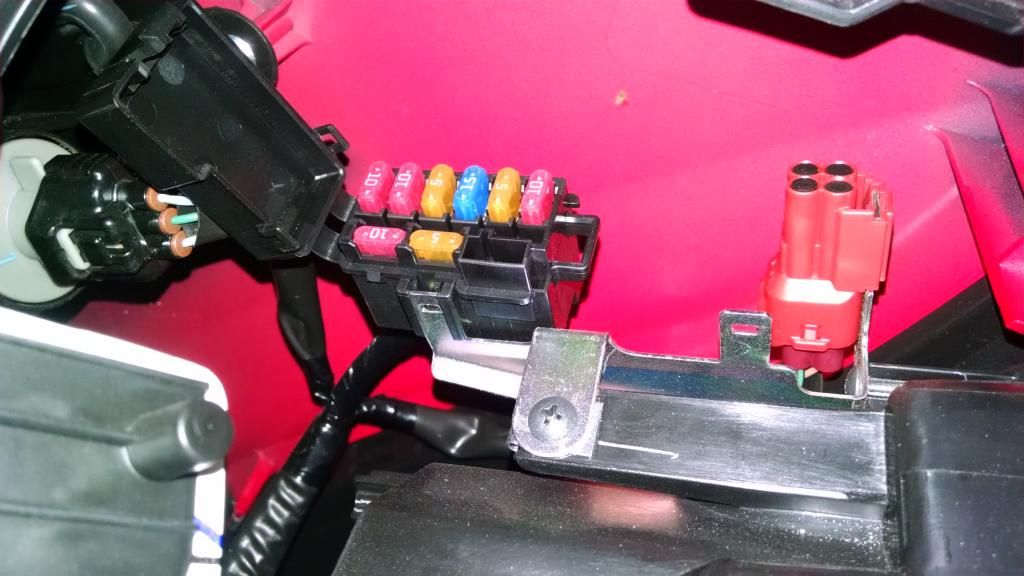
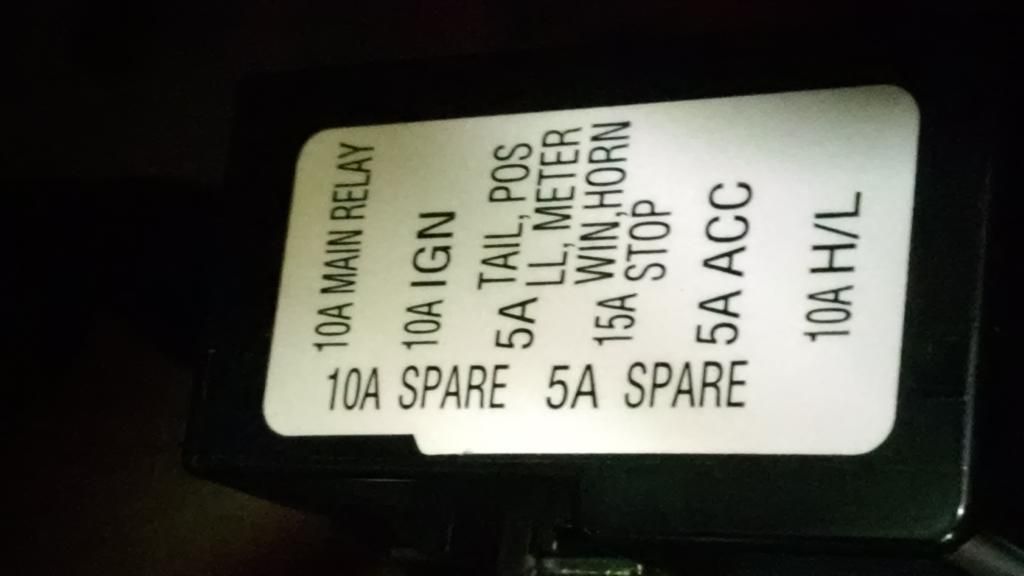
It's the reserve tank maintenance flap apparently.
Re: Anyone been in here?
Posted: Fri Aug 22, 2014 2:57 pm
by fish
Alibally wrote:It's the reserve tank maintenance flap apparently.
https://www.youtube.com/watch?feature=p ... YmMNpbFjp0
but not very helpful.
Fish
Re: Anyone been in here?
Posted: Fri Aug 22, 2014 3:53 pm
by Alibally
For the coolant reserve tank perhaps. One of the 2015 owners want to chip in?
Re: Anyone been in here?
Posted: Fri Aug 22, 2014 4:05 pm
by BRed
fish wrote:Figured out what this hatch is by the part name ...but, has anyone been in there to see what's in there ..or why it's needed.
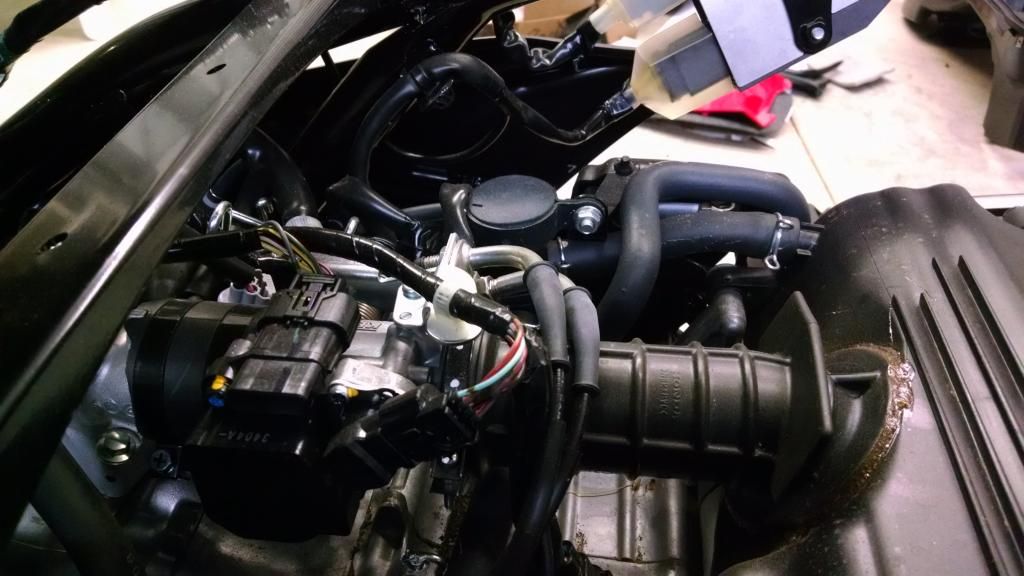
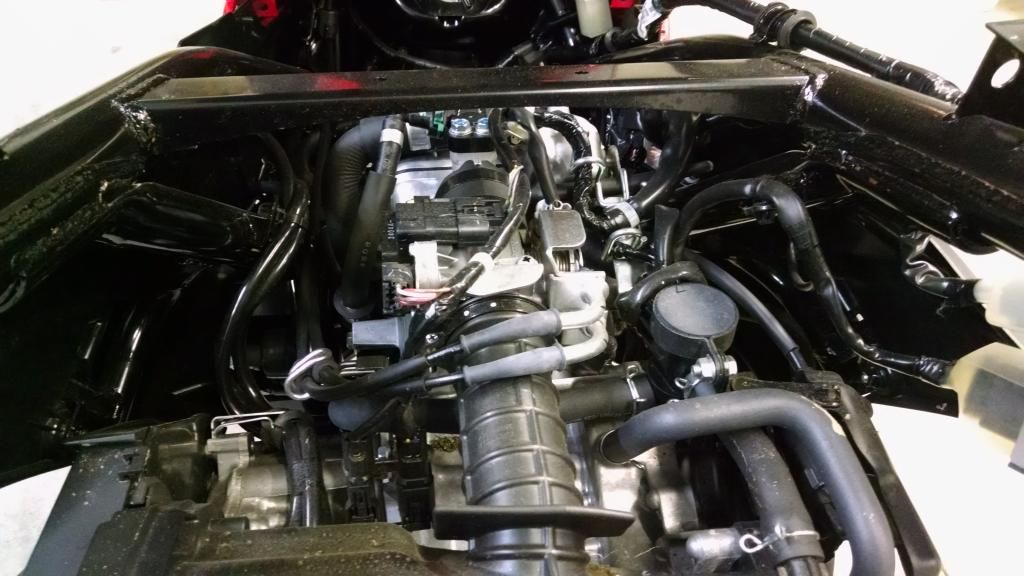
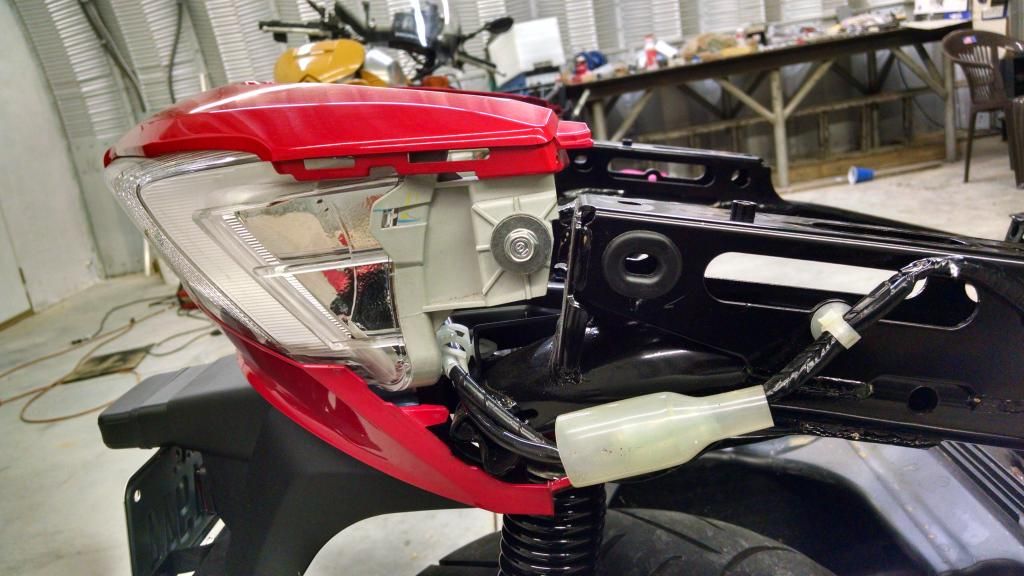
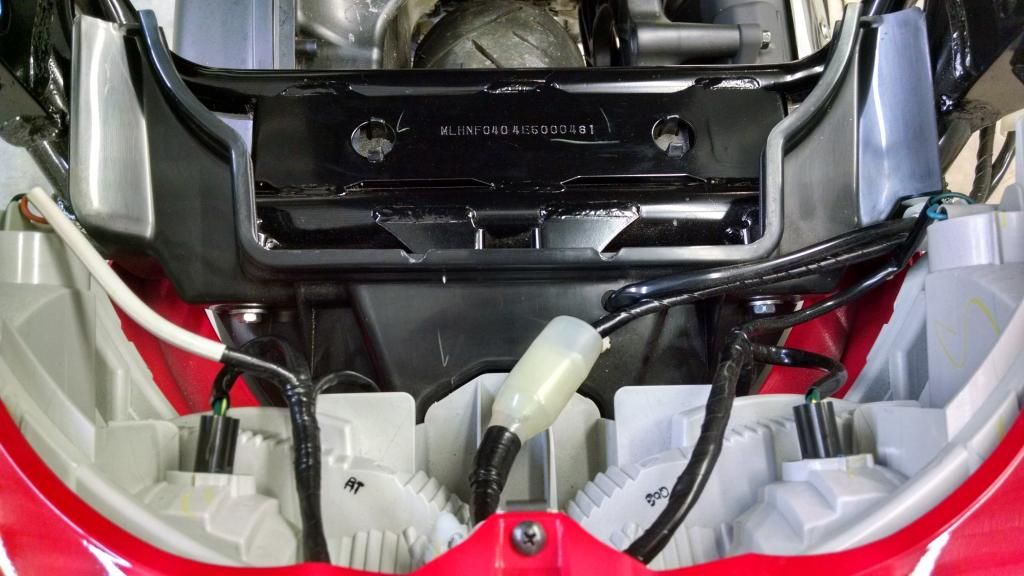
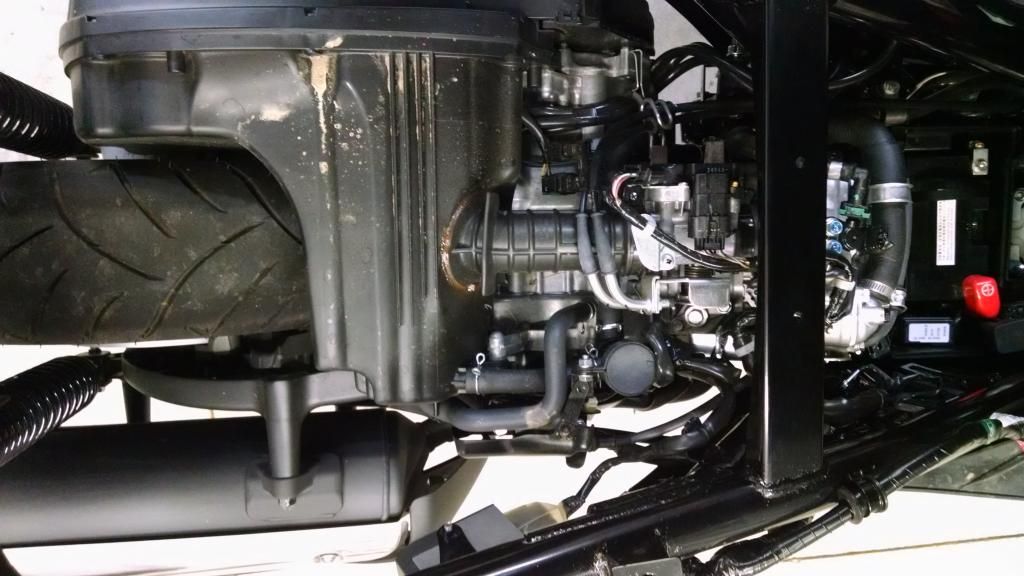
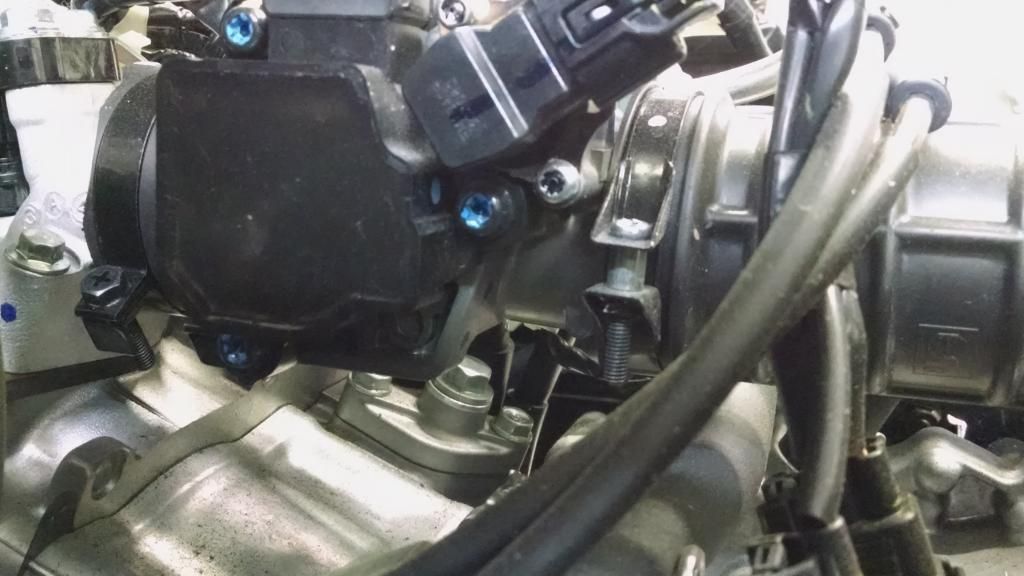
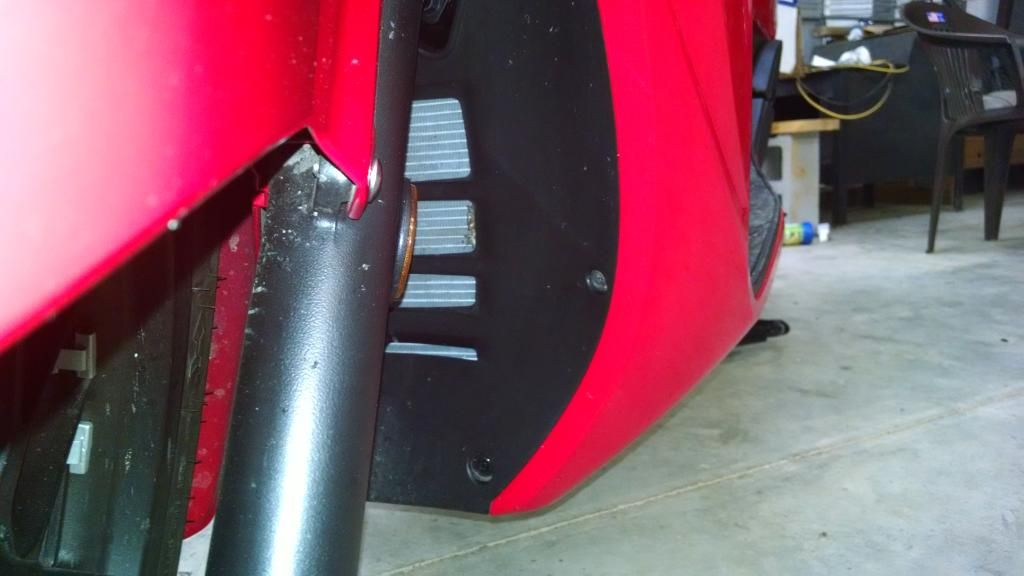
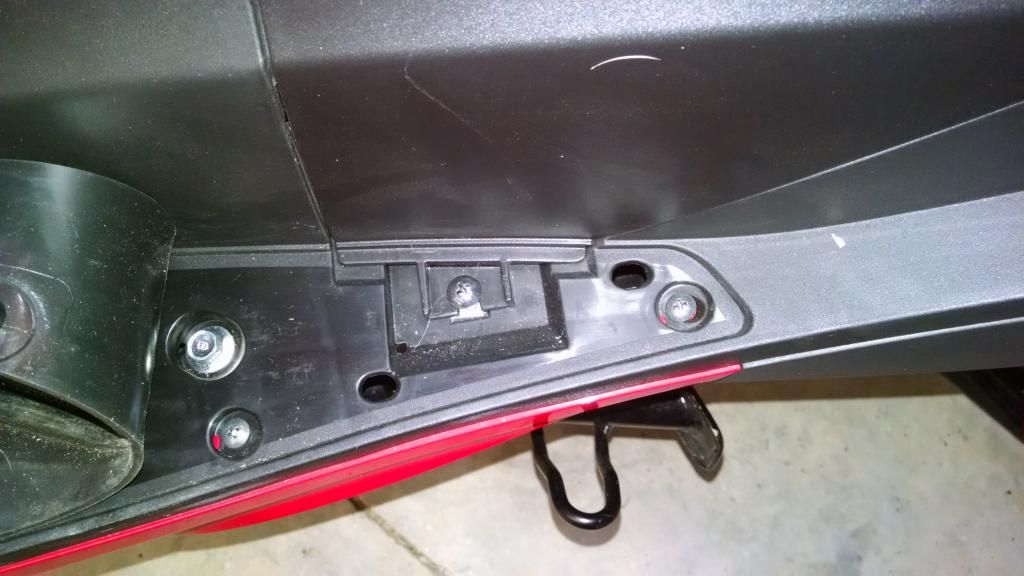
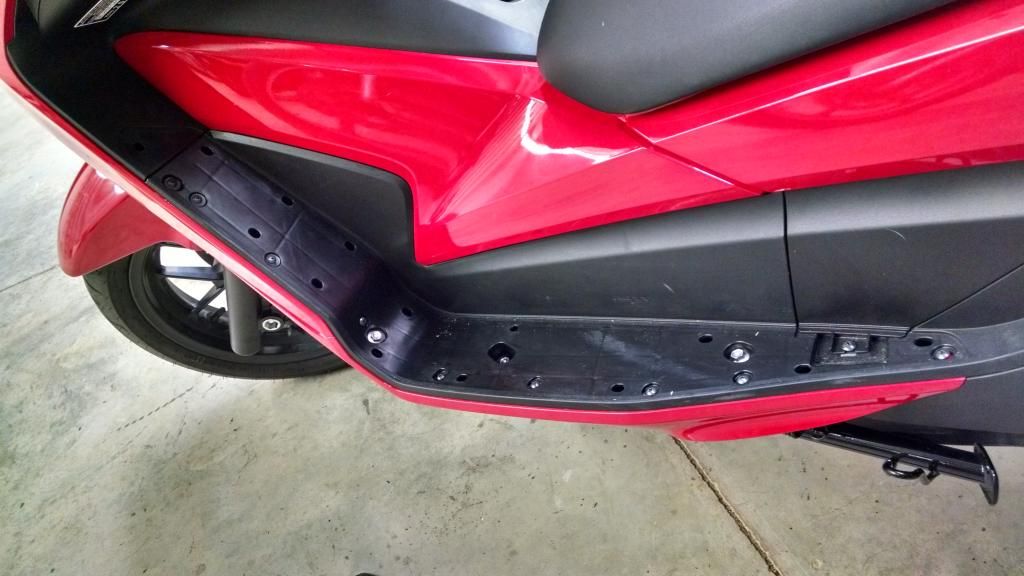
It opens directly over the fuel injection throttle body....
it has to be a service port for the fuel injection, since that's about the only component accessible through that small window.
Re: Anyone been in here?
Posted: Sun Aug 24, 2014 5:27 am
by BRed
Re: Anyone been in here?
Posted: Sun Aug 24, 2014 12:43 pm
by fish
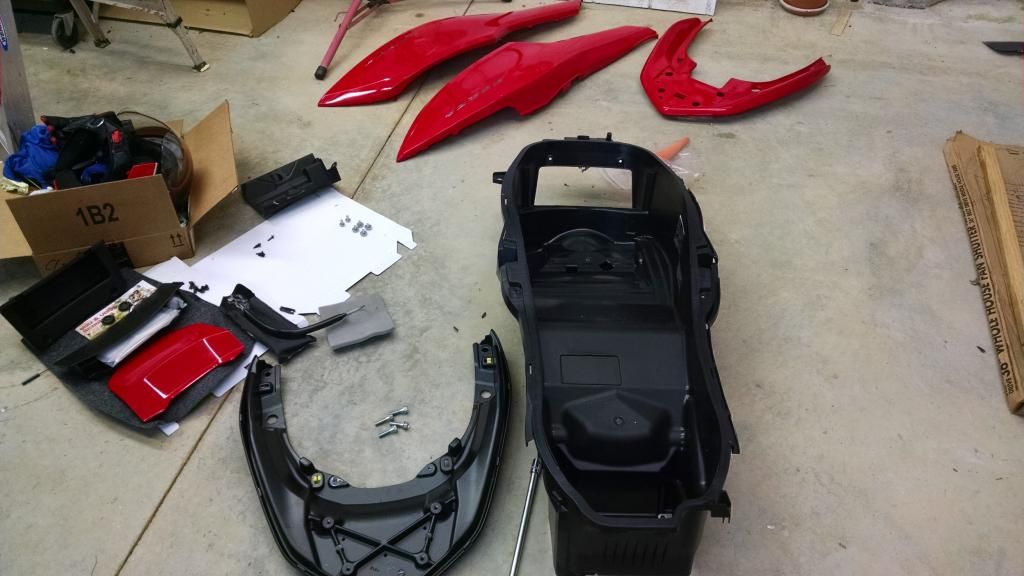
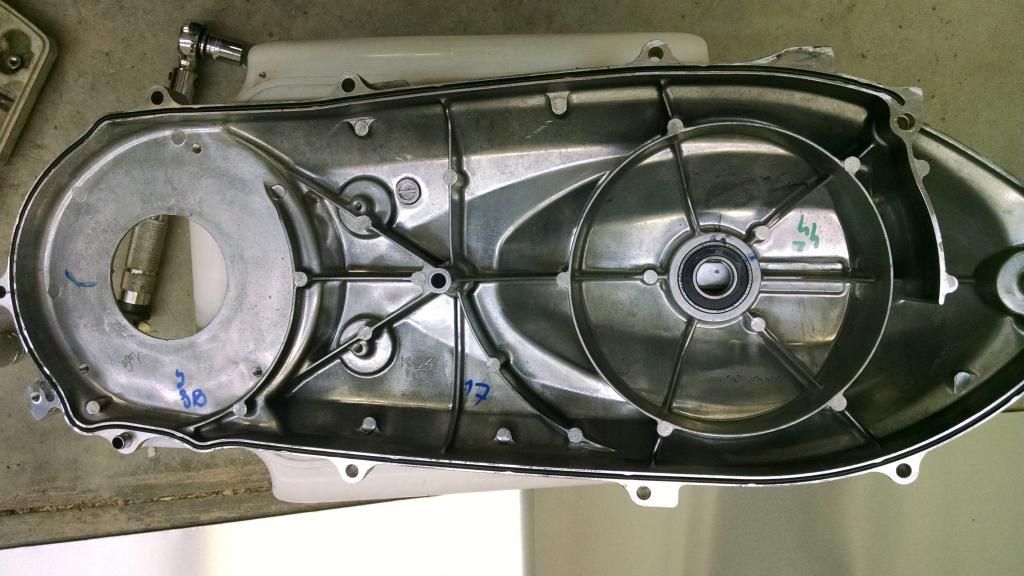
[quote="BRed"]this shows it a little clearer......
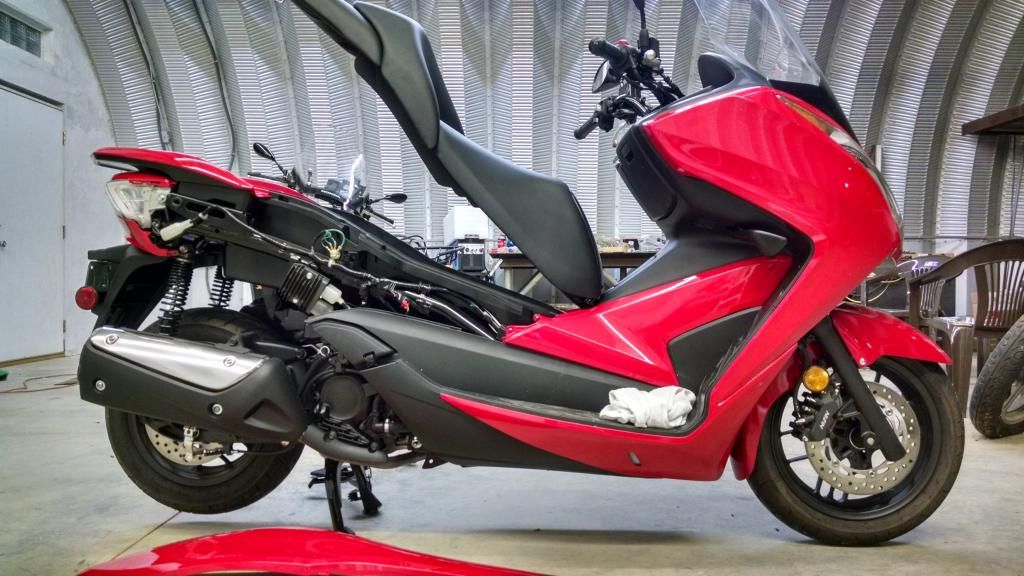
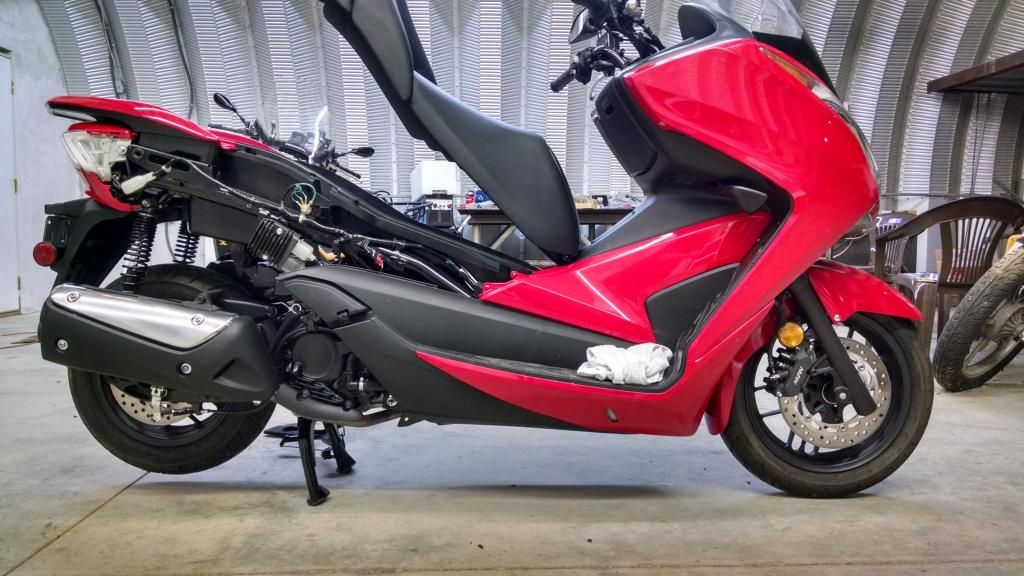
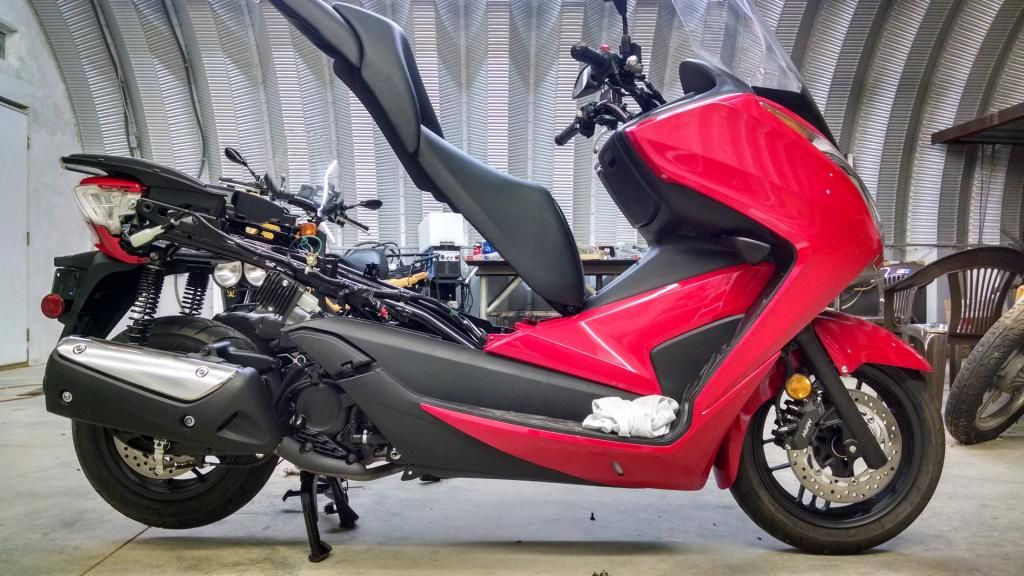
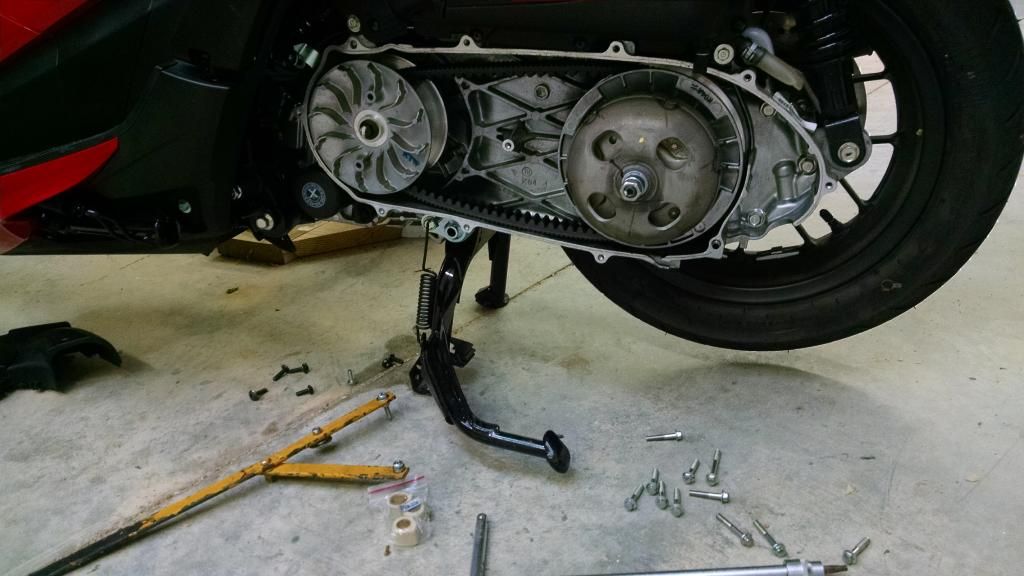
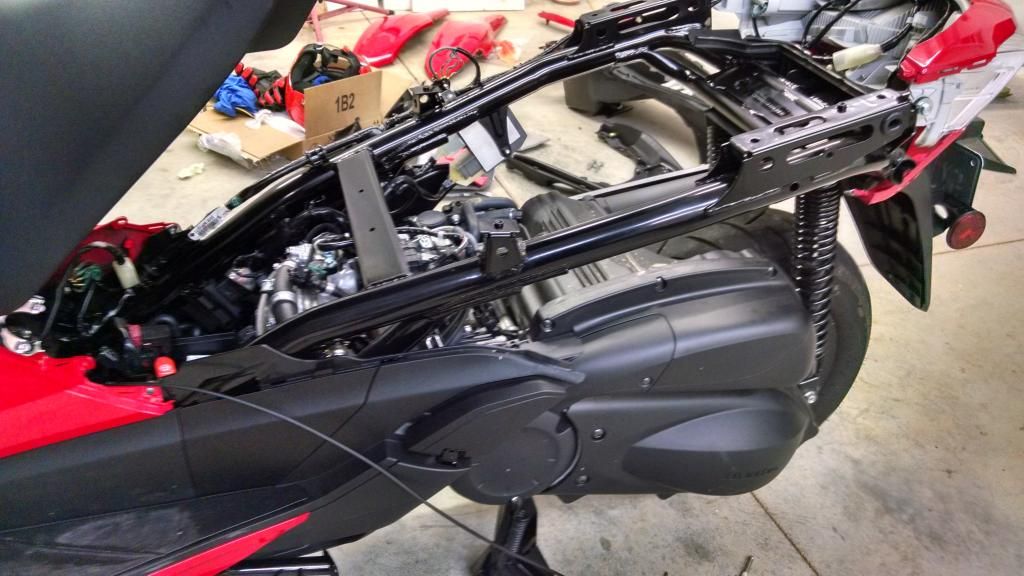
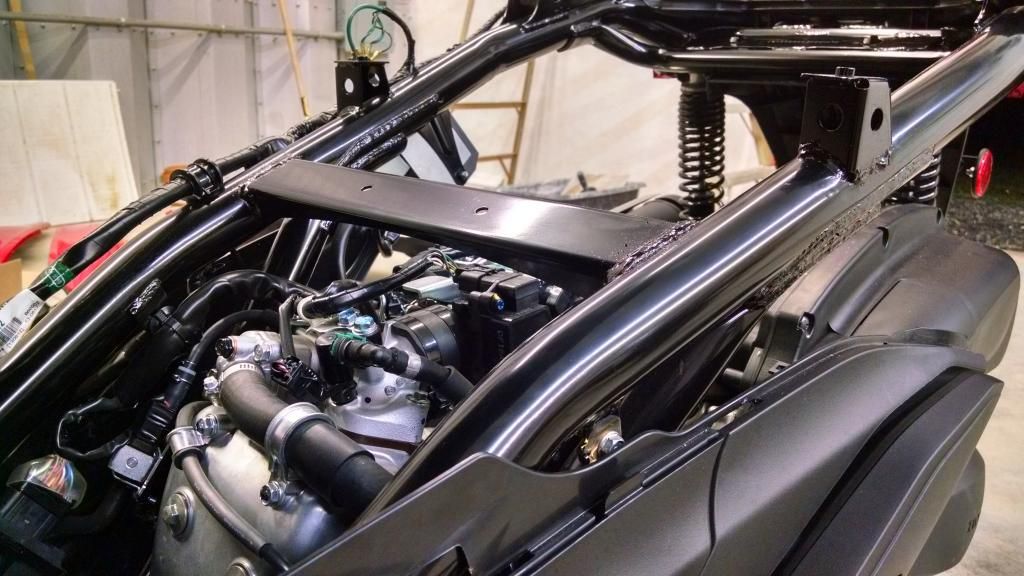
Some pics from an early teardown I did just to familiarize myself with the scoot.....
I plan to use the Forza as a light tourer and you never want to have to learn these things on the side of the road.
As with most Honda "plastic bikes", with a few secrets, it came apart with lots of drama, but no trauma....
several times I was sure I had broken something because of the horrendous noise at release but...not!
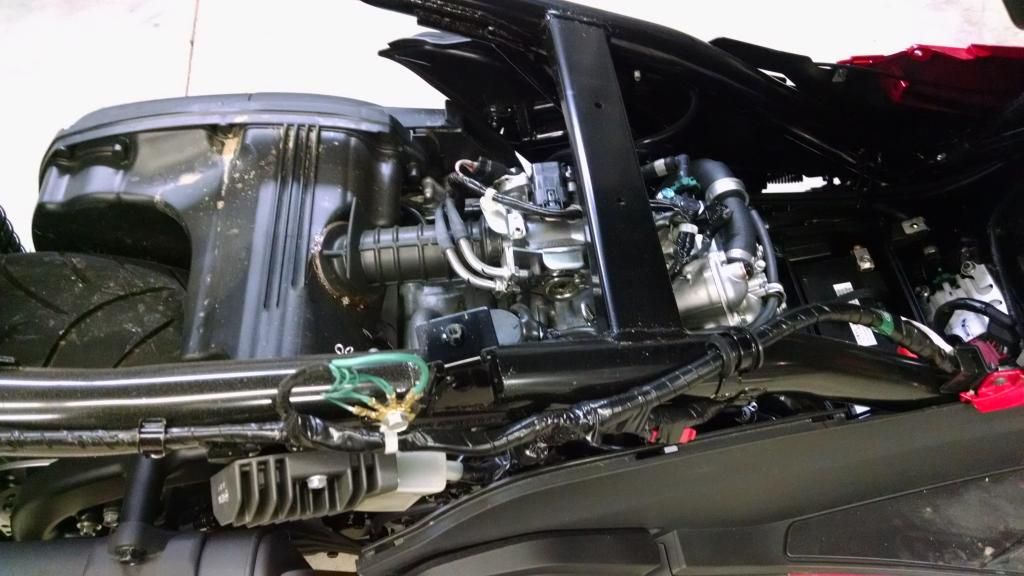
You have to remove a lot of plastic to get a clear view of the engine.....
and the CVT
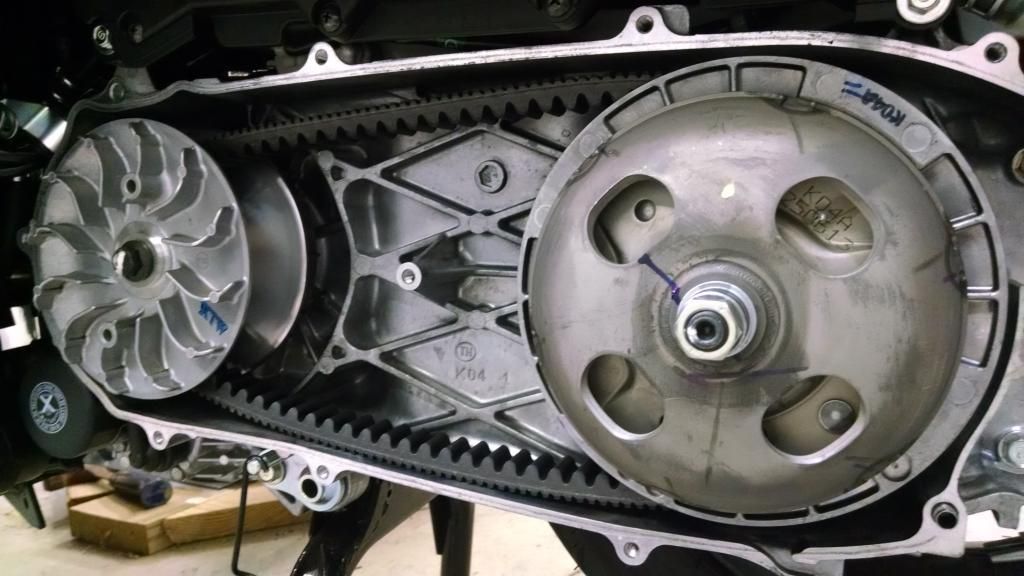
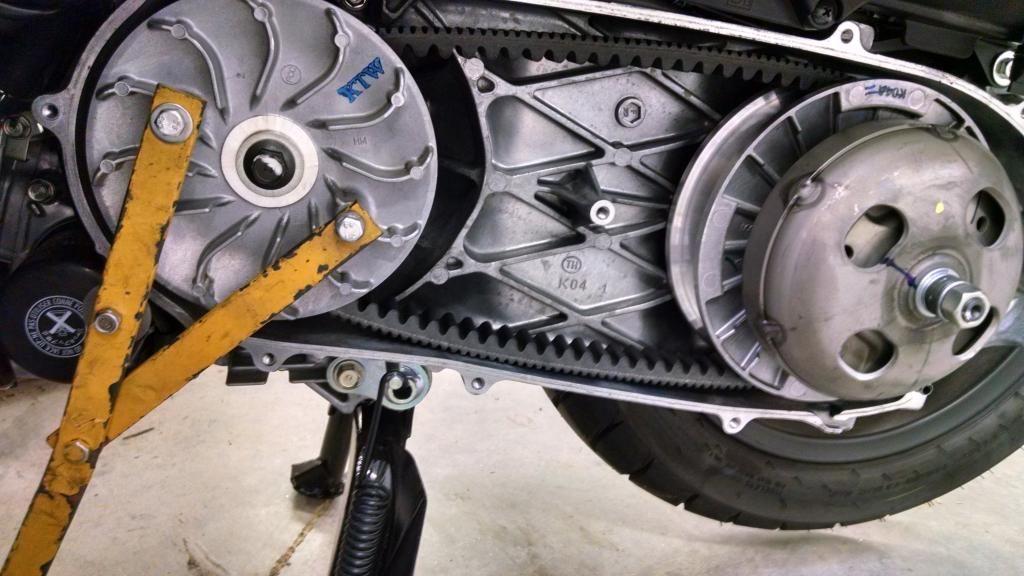
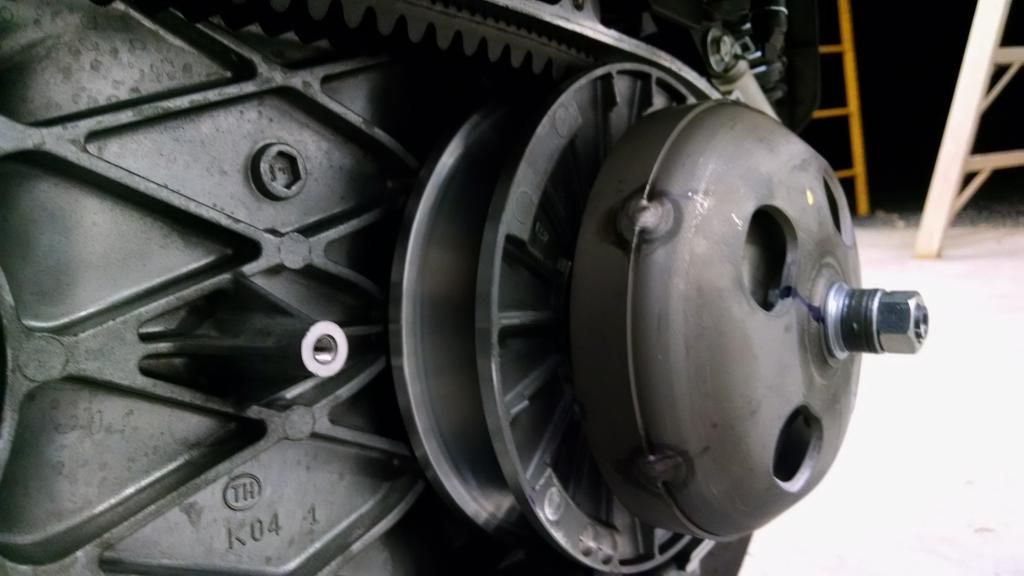
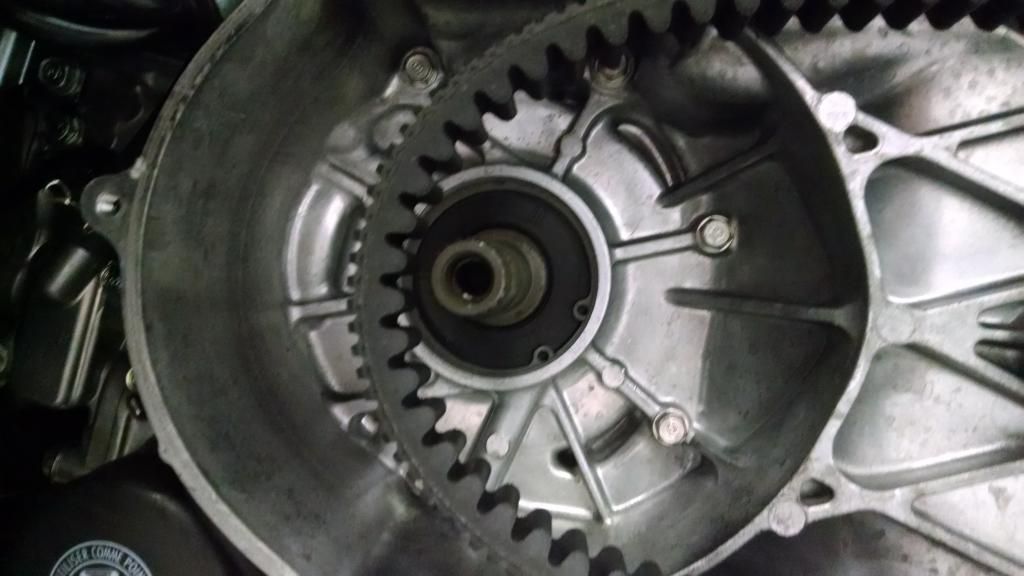
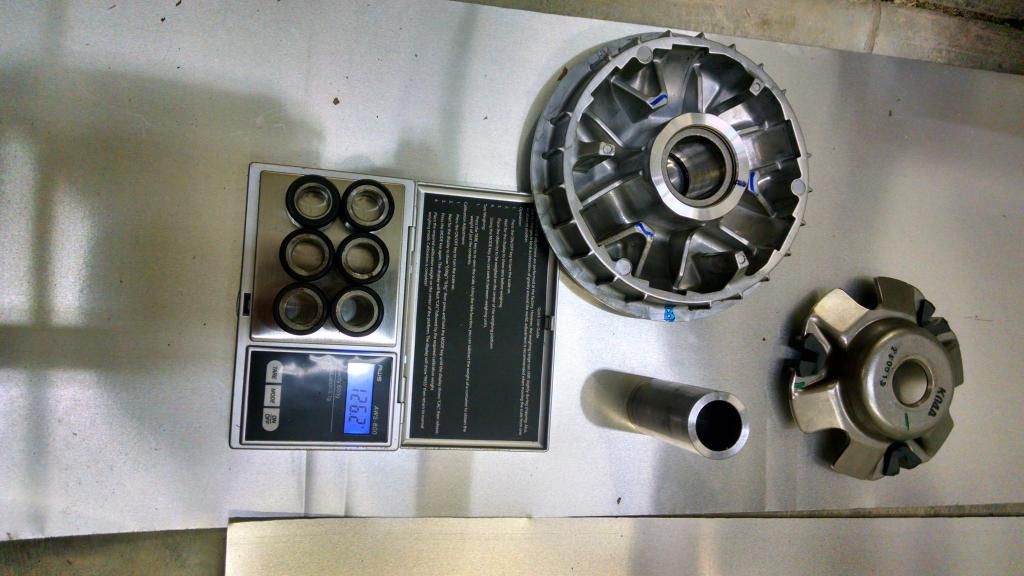
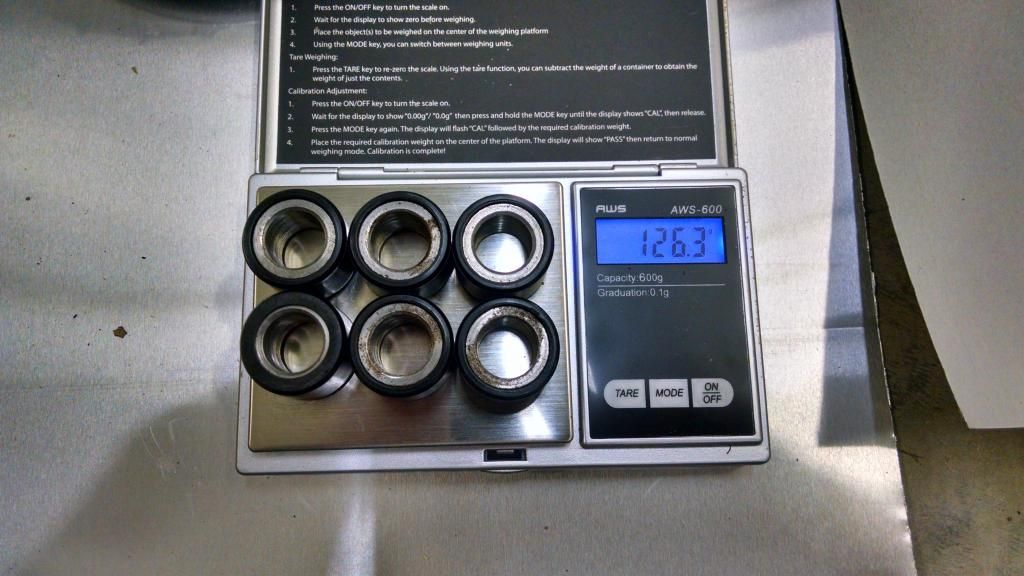
the most significant difference is a variator bolt instead of a variator nut and a double cogged belt, like the Silverwing
the rear pulley is redesigned from the Reflex/BR stamped metal driven pulley....
the Forza uses a cast pulley, but still uses the same CN250 (Helix) type clutch pack used on all Honda 250 scooters.
quote]
BRed,
Absolutely fabulously useful photos!
Thanks so much !!
So many questions about what you found....but maybe some time you can expand on your findings?
Two questions if I might:
#1 This popped to mind when I saw that belt cover off : The CVT belt cover was an terrific bear of a job to get to release on my Kymco scooter. How was it on the Forza?
and #2 would you have a bird's eye look of the engine straight down at the under-seat area...or did having the seat in place make this not possible?
Thansk again so much ...these photos will be of great use to a lot of us! I was thinking along the same lines....
Fish
Re: Anyone been in here?
Posted: Sun Aug 24, 2014 4:39 pm
by you you
Have garage envy

Re: Anyone been in here?
Posted: Sun Aug 24, 2014 5:18 pm
by BRed
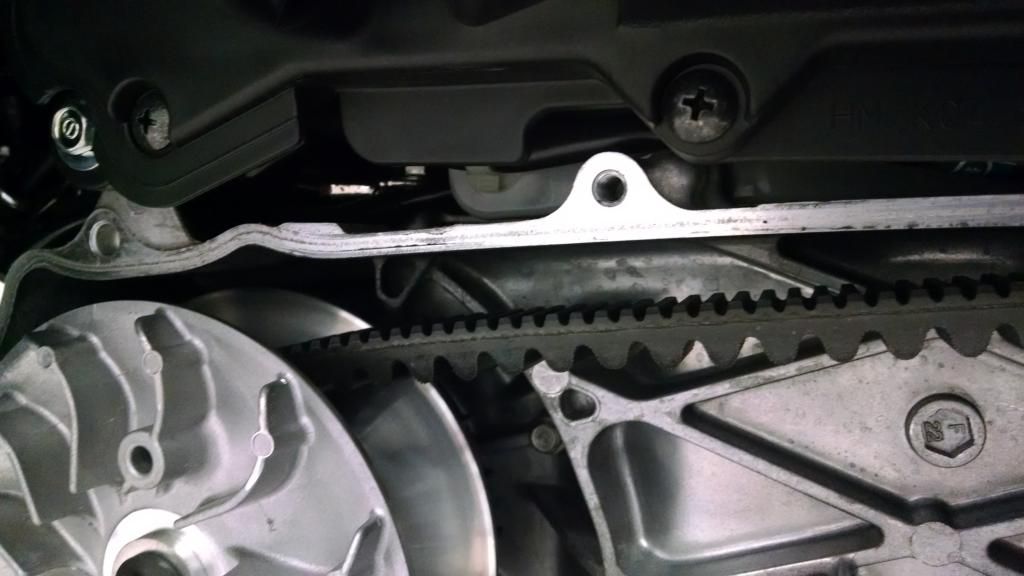
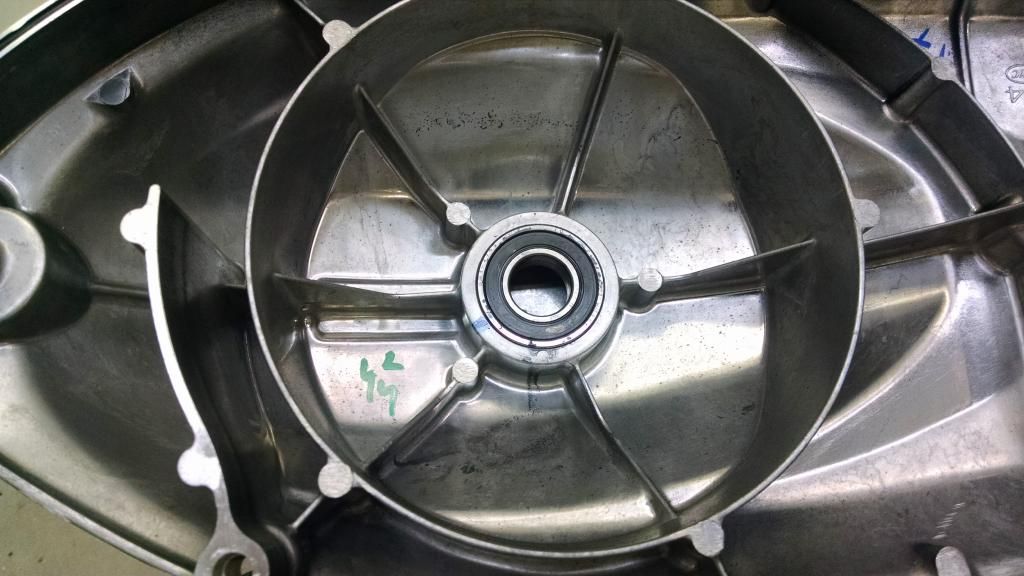
The CVT cover was easy to remove, but it uses 3 different length screws so there was a little trial and error putting it back on....
there's also one central cover screw that's easy to miss when disassembling it if you're familiar with the Reflex or BR (they don't have it), but the cover won't budge until you find and remove it (midpoint, at the bottom of a deep well, directly between the two pulleys).
Reinstalling it requires careful alignment to insure the external clutch bushing w/ 2 grease seal O-rings, fits into the outboard support bearing properly....
a little tedious but not difficult. You have to regrease the clutch bushing each time you remove the cover and I suspect the O-rings have a frequent replacement schedule...most Honda O-ring seals get replaced at every inspection or removal, according to the service manual.
You don't want this bearing slinging grease onto your clutch pads or driven pulley.
I'll go through the Droid and see if I have any overheads of the engine....I took 100s of pics.
I didn't remove the seat at the time because I couldn't find a thin enough wrench to fit the narrow joint bolt on the opener damper.
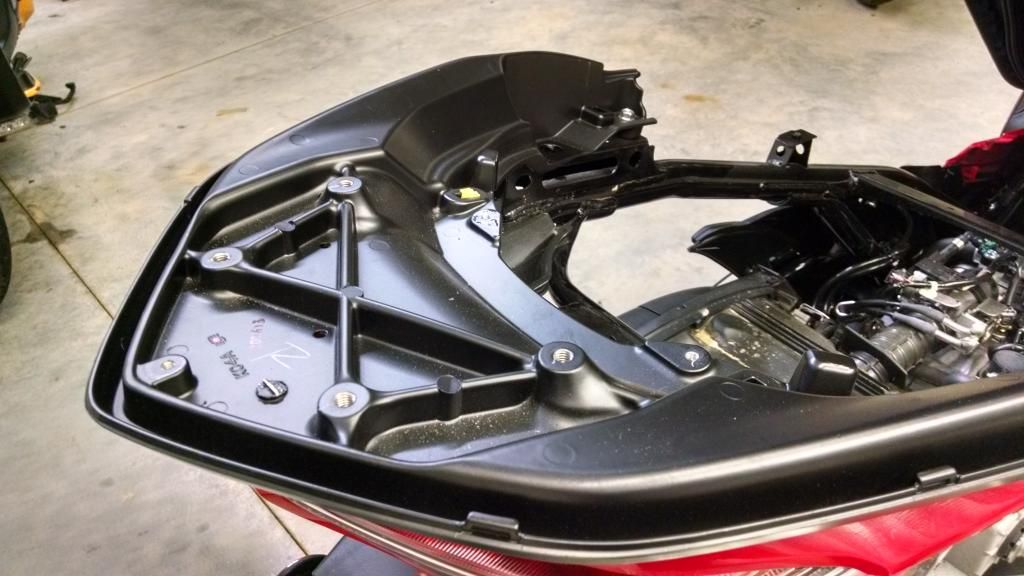
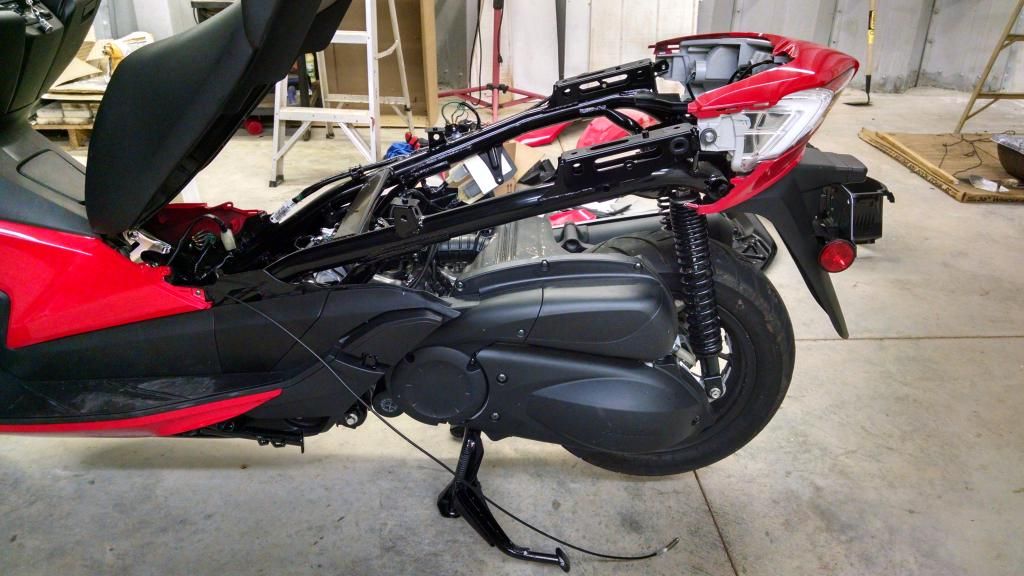
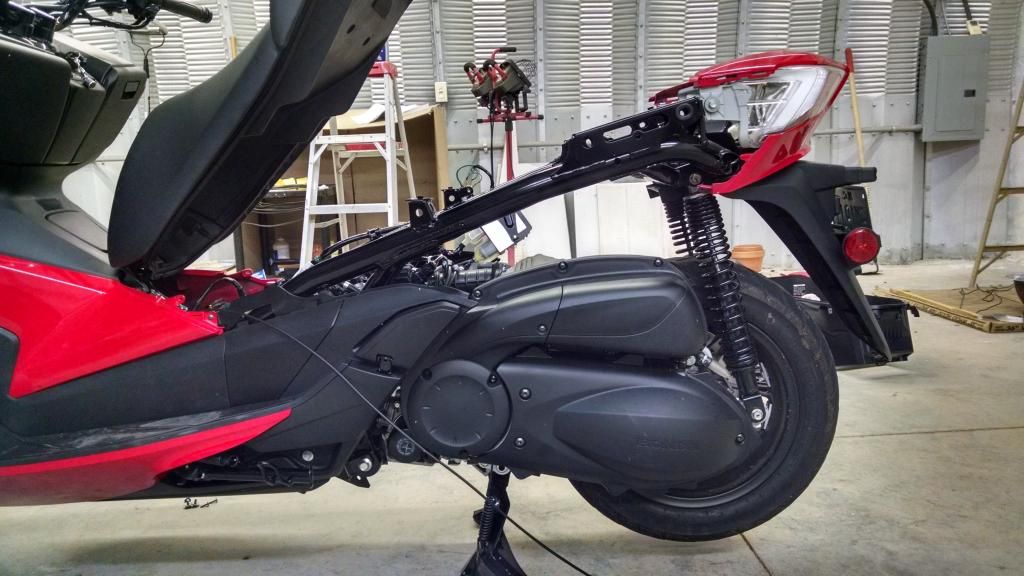
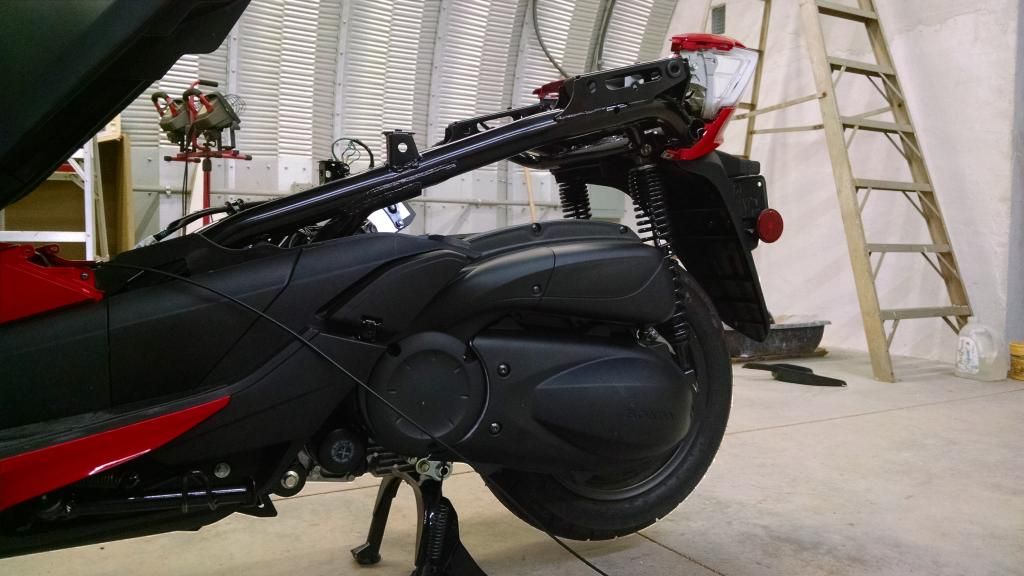
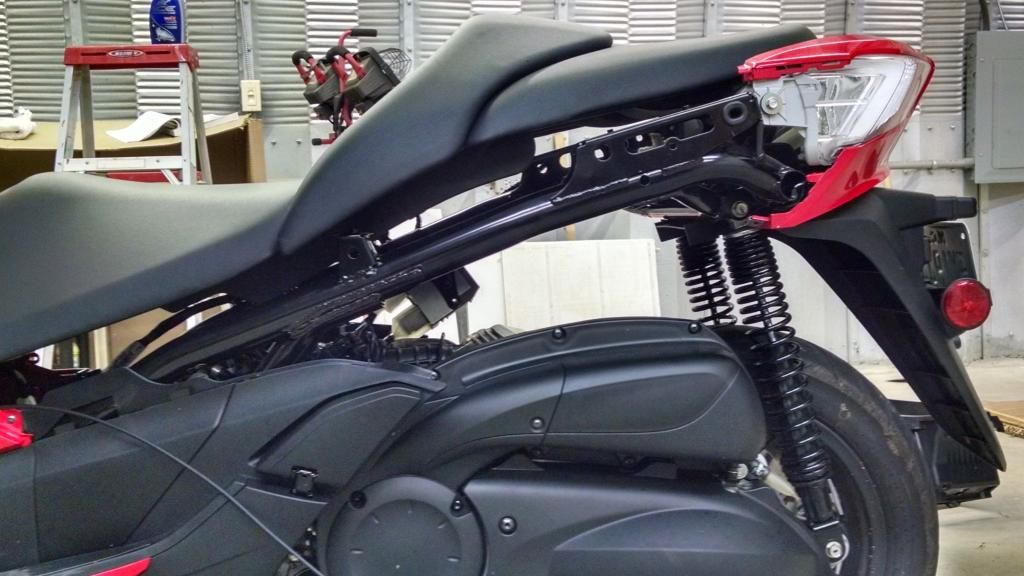
The rear spoiler is one massive hunk of cast aluminum bolted directly to the frame....it makes a super strong grab bar and tailbox mount.
The plastic trim just snaps over it. Seeing it removed and up close has convinced me to try to make my own box mount.
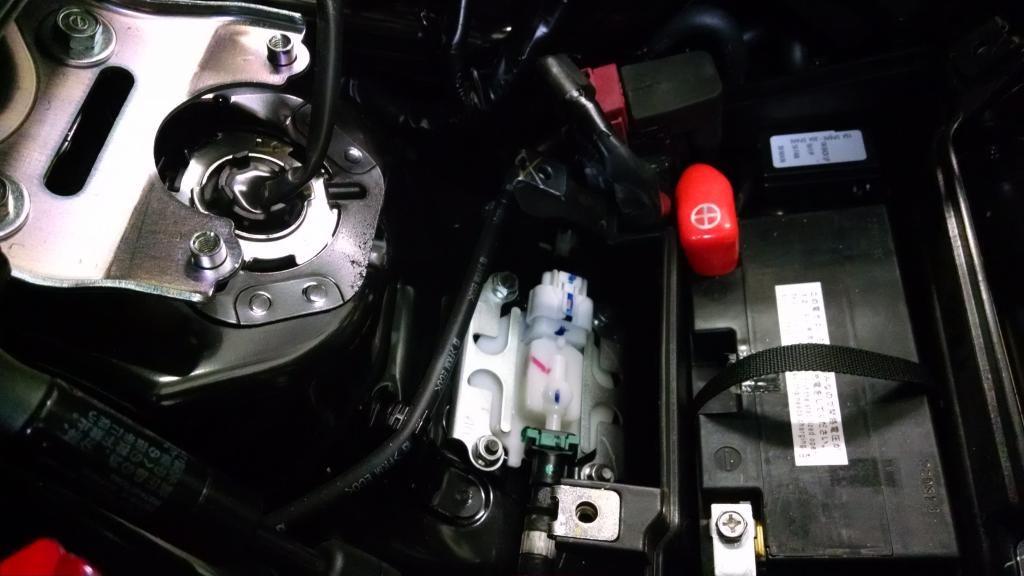
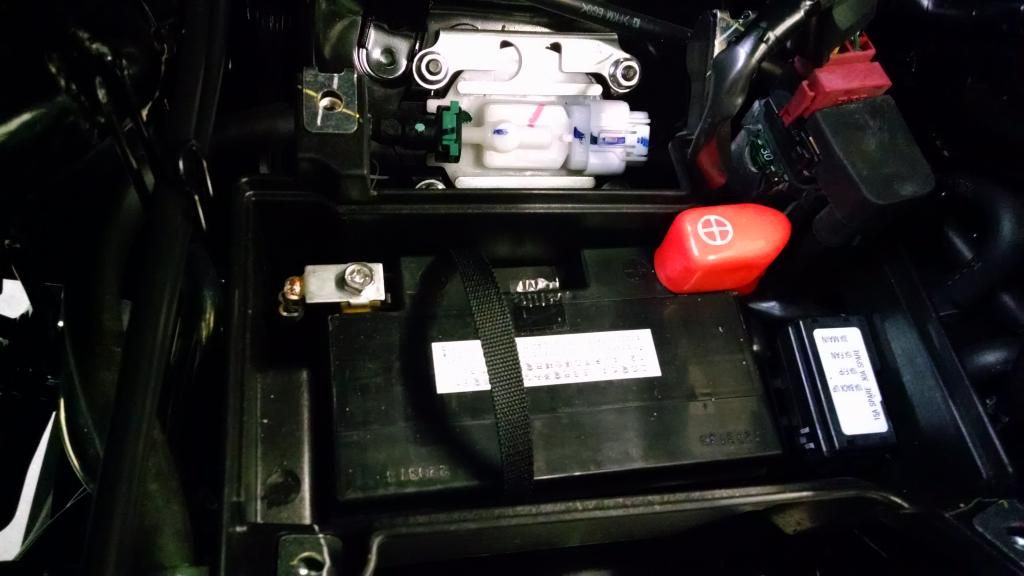
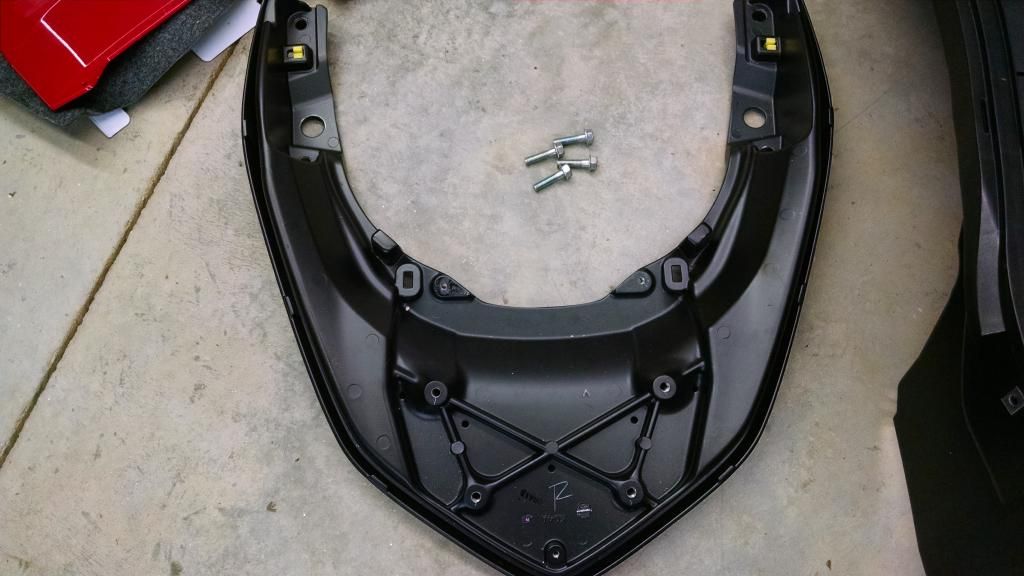
The battery box is completely loose and just laying on the floorpan of the scoot once the luggage box is removed.....
four screws slightly lift and secure the battery box to the bottom of the luggage box, when it is installed.
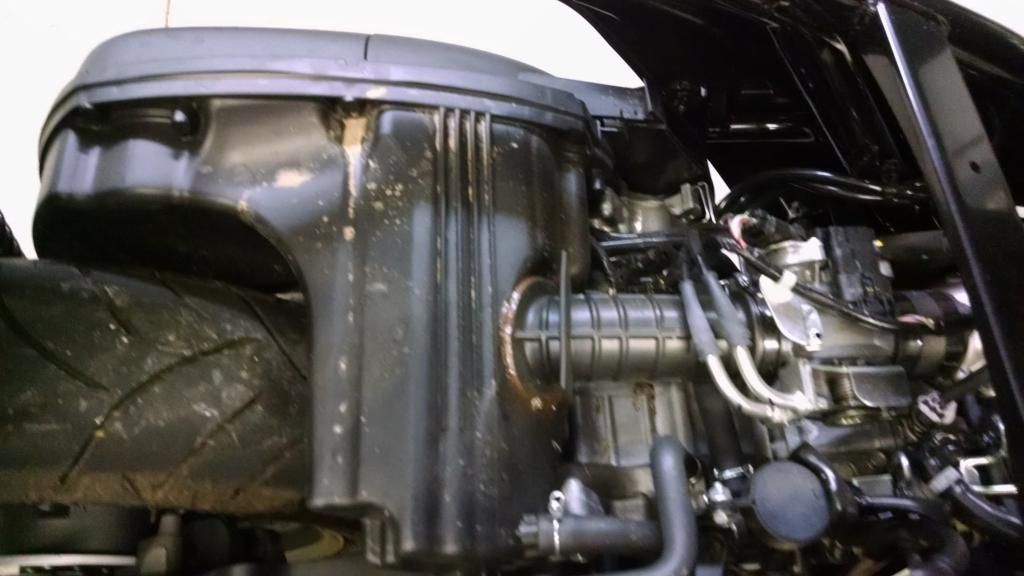
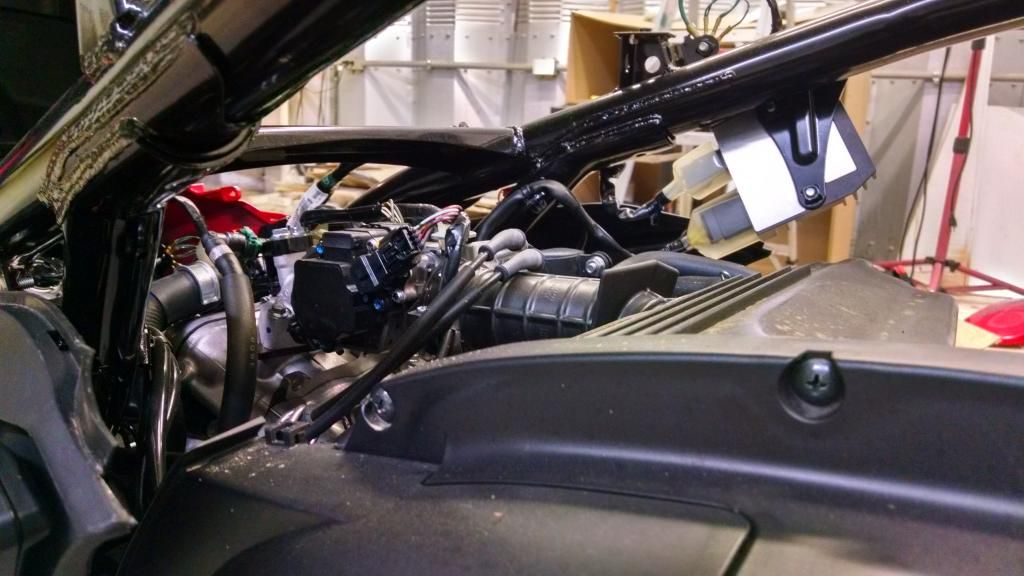
There's a spot on the top of the engine housing right under the air snorkel from the air box to the throttle body that will collect a lot of dirt and debris....
you can see it in the pics after about 300 miles....
the rear tire slings wet stuff up and over the crankcase and under the luggage box and it collects on top of the engine there.
A point of attention when cleaning your bike.
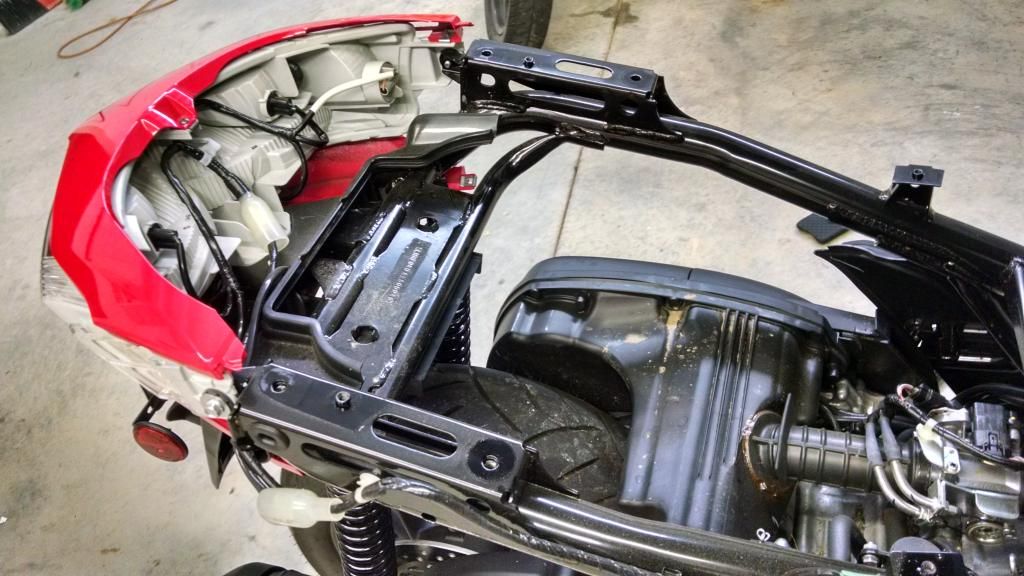
The rear wheel and final drive still have the standard bracket for the ABS, but on my Forza, the sensor is not installed....
I plan to use this mounting point on the final drive for the Veypor's rear wheel sensor.
Re: Anyone been in here?
Posted: Sun Aug 24, 2014 7:31 pm
by fish
BRed wrote:The CVT cover was easy to remove, but it uses 3 different length screws so there was a little trial and error putting it back on....
Thanks for your reply!
Yes, the first thing I wanted to do with my Kymco was get a look at the guts - under the seat. Crazy easy on the Kymco - 5 mins I'm in there looking around!
I think any pix you feel like posting will be appreciated by a lot of Forza owners!
Thanks again, Fish
Re: Anyone been in here?
Posted: Mon Aug 25, 2014 6:43 am
by mboni
Thanks for the detailed information and pics, BRed.
BRed wrote:I didn't remove the seat at the time because I couldn't find a thin enough wrench to fit the narrow joint bolt on the opener damper.
The seat damper has a ball and socket joint, and you can just pop the ball out of the socket with a little pressure. No wrench needed.
Re: Anyone been in here?
Posted: Fri Aug 29, 2014 5:06 am
by robisc
Great pics... Thanks very much.
Re: Anyone been in here?
Posted: Fri Aug 29, 2014 8:07 am
by Vulcandanny
Thank you very much BRed, very very helpful.
Re: Anyone been in here?
Posted: Fri Aug 29, 2014 10:44 pm
by BRed
Re: Anyone been in here?
Posted: Sat Aug 30, 2014 7:02 am
by fish
BRed wrote:fish wrote:Figured out what this hatch is by the part name ...but, has anyone been in there to see what's in there ..or why it's needed.
It opens directly over the fuel injection throttle body....
it has to be a service port for the fuel injection, since that's about the only component accessible through that small window.
BRed,
A question: Hope to heck I never have to go down thru all that plastic for anything other than a valve adjustment (assuming we can buy the shims someplace) or maybe changing shocks out.....
But, to the point ~ to me it seems that underseat tray removal is a important step to learn...it has got to come out to get at anything important ...or just to let the owner look at the guts of his scoot...anything tricky about getting that underseat tray out and back in again ... and getting the seat release back together properly?
We really appreciate that you shared these tips and pix with us!
Thanks , Fish
Re: Anyone been in here?
Posted: Sat Aug 30, 2014 4:00 pm
by BRed
In order to access the engine and remove the valve cover, you have to remove everything pictured above and in that exact order.....
1) side panels (these have one screw and one pushpin "trim clip" and one snap locking lug to grommet)
2) topbox mount cover (pushpins)
3) rear spoiler cover (one screw, pushpins and 4 snap to grommet locking lugs but you
don't have to unbolt the aluminum spoiler as I did)
4) battery box cover (3 screws)
5) under seat luggage box (6 screws)
the luggage box fits the frame like a glove and has lots of support but there are three minor disconnect points during removal
first you have to disconnect the luggage box mudflap at rear left...I pulled it from the frame and left it attached to the box
then remove the seat release cable in the groove along the left side and at the rear latch mechanism...
standard cable end....snap the cable end out of the holder and swing the cable around the lever to release - no tools required
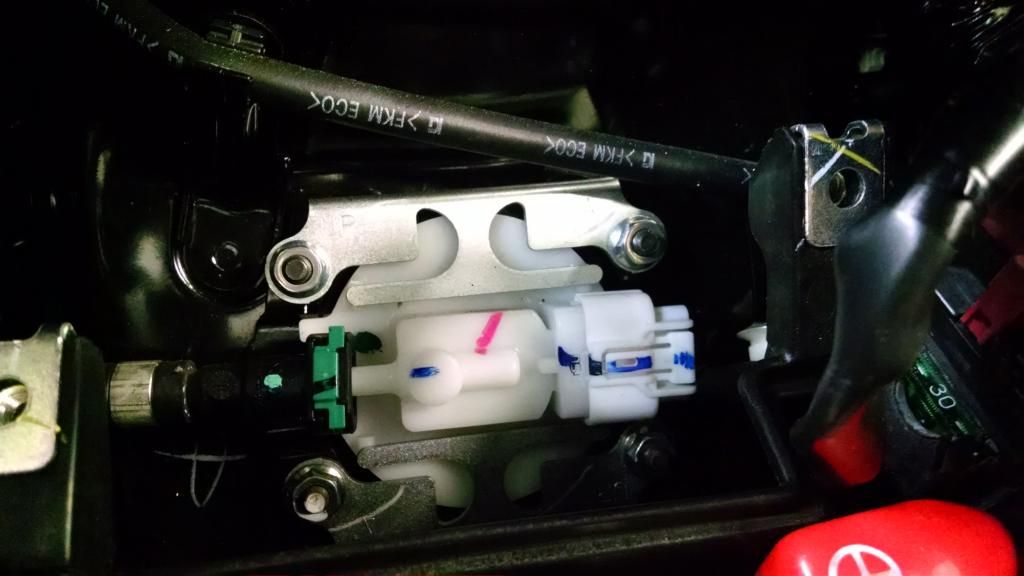
finally, the fuel gauge sensor wire at front right corner of the box....careful here
you don't see this wire hooked to a plastic tab outside the box and directly above the battery until you lift the box about 1-2" exposing it
go slowly while lifting the box out until you're sure you've found and dealt with all 3 disconnect
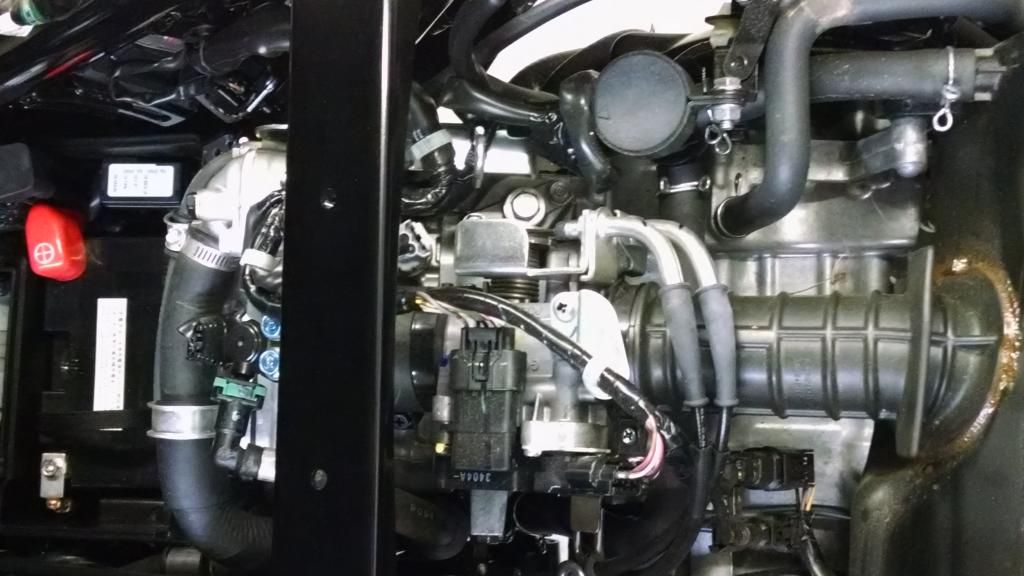
spark plug, coolant, oil subsystems are all accessible through service ports.....
since there's no carb, the valve adjustment is the only underseat maintenance item required
(other than the occasional fuel pump replacements...maybe that why the fuel pump has a quick disconnect?)

I would definitely recommend removing the seat as well just for ease of access
Re: Anyone been in here?
Posted: Thu Sep 04, 2014 5:09 pm
by Hoyt
BRed its a nice work !! this post should be tagged to be easily found.
I was pretty interested into removing the side panel to access to rear shocks, but never found how to get them out, nothing move.
I managed to change without removing anything, but still interested.
Now i have to remove the front panel cause an asshole kick my forza and still nothing move

Could you indicate us the way to remove the panels, is there hidden screws or else ??
Re: Anyone been in here?
Posted: Thu Sep 04, 2014 11:52 pm
by BRed
Hoyt:
that looks like the front lower panel, under the floorboards, right?
Honda calls it the left floor skirt.
one screw goes in horizontally from the front, right at the radiator cover (through the front lower cover)
one pushpin (trim clip) goes in vertically from bottom front corner
one bolt goes in horizontally just behind the kickstand recess
remove the panel rear to front.....
once the fasteners are removed, unhook the rear tab from the slot in the floor step (floor board...this is right above the kickstand)
in the center of the panel is a standard Honda type locking lug and grommet....
pull the center of the panel straight out 1" to release the lug from the grommet
unhook the tabs along the vertical edge from the front cover and front lower cover
(it looks like you already have these unhooked in the pic...according to the manual, they are disconnected last)
reassemble in reverse order
Re: Anyone been in here?
Posted: Fri Sep 05, 2014 1:44 am
by Hoyt
BRed wrote:Hoyt:
that looks like the front lower panel, under the floorboards, right?
Right !
BRed wrote:Hoyt:
(it looks like you already have these unhooked in the pic...according to the manual, they are disconnected last)
Not me, i dont know how to do it yet, but seems another scooter hit me in the parking and unhooked the panel partially.
I will try using your indications, but maybe, some pics with the indication of the thing to remove and the order will me useful.
You talk about a manual ? Technical manual ?
Re: Anyone been in here?
Posted: Fri Sep 05, 2014 10:55 pm
by BRed
Hoyt, here are some pics from my Forza.....
the first step:
I'm not sure but you may have to remove both the pushpin and Phillips screw in the lower front panel....
the service manual says remove the Phillips screw
second step:
remove this pushpin from under the bottom of the scooter (sorry for the bad picture)

third step:
remove the floorboard rubber mat by pulling it UP slowly from the rear....it just pops out
remove the rear Philips screw exposed under the floorboard, right at the end of the panel
now I think I have discovered an error in the US version of the Honda NSS300 Service Manual.....
the manual says unsnap the locking tabs along the panel and floorboard deck, but on MY Forza I discovered a row of Phillips screws that appear to be securing the panel.
what you do here depends on what you find under the floorboard....
obviously something changed in the specs for this panel
There is also one Honda snap lug to rubber grommet in the side of the frame, right in front of the kickstand mount, where the rear of the panel has to come straight out from the frame about 1" to release it.
Almost every Honda bike body panel has one of these lug & grommet fasteners somewhere on it to fix it's position relative to the frame.
I hope these pictures help.