
Been some talk in some other threads about the USDM headlights not having the provisions for the integrated turn signal. Well this can't be true enough but you can add one if you would like. Hence you get the headlight out of the bike first which is a HUGE "P.I.T.A"!
Ok so lets begin by throwing that bad boy on your work bench!
Tools
micro side cutters
various files
drill bits i believe the main hole is 1 inch round i use a stepper bit
balls, big titanium ones!
1156 socket and AMBER bulbs
Some logic... =P
solder & heat shrink
headlight on the bench with the 1156 sockets I got from some corolla at the junk yard

1156 socket woopty-doo!

as you can see from the back side there is provisions for both the turn signals and the day time running lights below

signal location

daytime running light location

remove nubs from center of bulb socket location


once nub is removed use this location to find center of the hole you can be off a little bit and proceed to drill


now slightly open the hole i use a small stepper bit and then switch over to the big boy


now we will make a quick template for all the little notches that need to go into the socket hole


now with the template in it's location i just sharpied where the notches need to go pretty straight forward


using a file to get a rough shape so the socket seats correctly this is going to take some time

socket seated!!! one side down now the other side!

take the old turn signals and solder the factory connectors on the new connects to have that oem plug n play feel


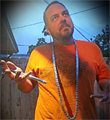
Test the blinker on the bike and if everything works, reassemble the bike. you did it, and saved a ton of cash. Side note that in my headlights there is some plastic dust inside i may go over the lamps with a heatgun to separate them and clean them out fully. if i even go this far i may black out the chrome =P Well thanks guys until next time. Here's my PCX as she sits tonight. I was so hyped I had to post. More pictures later when i get everything together. I'll do a video as well with the lights working.

PART II cont.
Place in over on a carboard sheet or cookie tray. Just make sure the light is not in contact with the metal grill. Put in for 7 mins at 250F

Once you get it out of the oven you will gently pry up the lens with either a screw driver flat, or in my case i used a door pry tool. Use to take off door panels in cars. I didn't get me sepreating the housing because it pretty much takes two hands. Just google headligt in the oven any of the videos are stright forward.
Here is the top lens and chrome piece all in one

back housing

5 screws hold in the chrome piece


Lens has been detached from chrome piece (no is a good time to enlarge the holes for the bulbs to fit


Black out treatment


everything buttoned up and pressed together as much as possible. place it back in the over for 7 mins to melt the silicon and then throw the headlight back on the bench and press it back together


Reassemble bike

DONE!